A kiln build
I began looking more seriously at atmospheric firings using gas-fired kilns in the autumn of 2023, and it became obvious that a test kiln was going to be necessary to hone in on a few slips and firing techniques, as our main atmospheric kiln is a bit large to turn around quickly enough for any meaningful testing. There was one problem though. Pretty much every brick at college was in half, many were in three parts from previous abuse… yikes!
Nonetheless I set about building a little kiln that produced some pretty satisfactory results. The first few firings were in our porcelain project and a few of us were looking at salt fired porcelain, and so many of the first firings in Little Wobbler were salt firings. In an ideal world it would have been just for soda firing, as once you have salted a kiln the bricks become forever contaminated with Chloride which will inhibit some effects unique to soda firing from developing (Nichols, Gail: Soda Clay and Fire, 2006). But as Clay College is a learning environment with limited resources and space that experimentation will have to wait until later. Besides, so many of the bricks had previously been used in other salted kilns so the dye was cast on that one! Building with used bricks was great, though, as so many of them had beautiful flashing from their previous lives in other kilns.
Pre-build ideals, constraints and goals
Goals
1.) can be packed and fired on the same day between the hours of 9:00-17:00
2.) uses little fuel to fire
3.) even top and bottom even when fired quickly
4.) representative or near representative of atmospheric firings in large kilns
5.) small chamber that can be filled for quick turnaround but not so small that ‘real’ pieces cannot be fired
6.) doesn’t need a bag wall to allow as much vapour in to the pack as possible
7.) easy to change size of exit flue
8.) packing space as close to a cube as possible
9.) two bricks thick on base and walls
Constraints
1.) condition of bricks (very few whole bricks, most in at least half some in thirds)
2.) for speed of construction I decided to build a kiln to match the size of the existing removable arches which had been made by the previous cohort
3.) due to condition of bricks, must be top loading rather than brick door
4.) no high alumina firebricks for the floor / firebox (the areas most abraded by the soda and salt)

Design and construction
The designs was informed by two mains sources: the test salt kiln in Phil Rogers’s Salt Glazing, and Nils Lou’s test sized kiln in The Art of Firing. Using Nils kiln as a guide, I opted for a bag wall free design where the burner port and exit flue are on the same side of the kiln, in more of a hybrid between a cross-draft and down-draft arrangement.
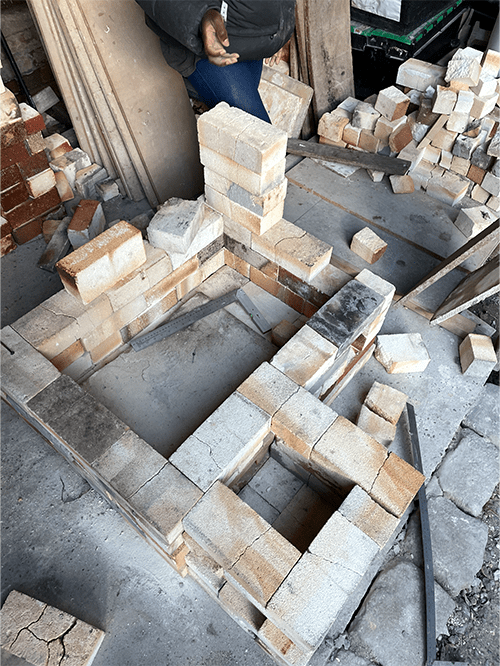
Using the dimensions of the arch as a guide (the fixed constraint of the build), I calculated that for a cube shaped packing space the kiln has to be 4 bricks wide, 3 bricks deep, and 6 courses high. Using our tutor Kevin’s small terracotta bricks I then built the kiln in miniature form to plan how to lay the bricks to accommodate the burner port and the exit flue. For ease of laying the exit flue was not placed centrally relative to the packing space, but rather offset to one side.
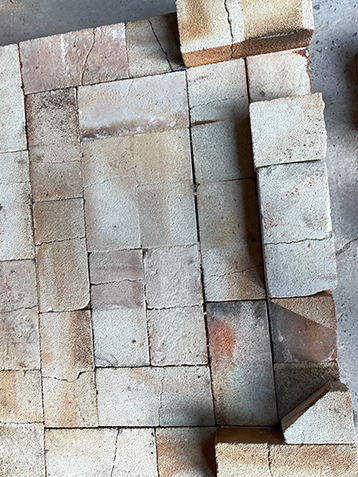
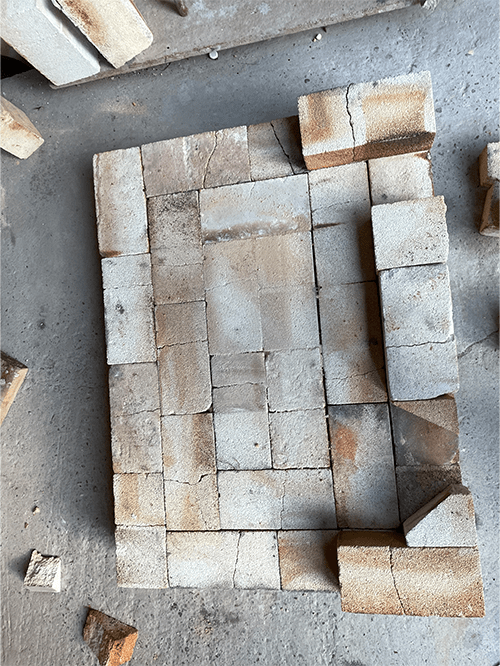
This top down view of the kiln floor (two courses deep) shows the layout of the burner port and exit from the chamber to the flue. Count the cracks on those bricks!!!
A small row of half heavies was placed to separate the firebox from the packing space to stop the salt spilling on to the ware.
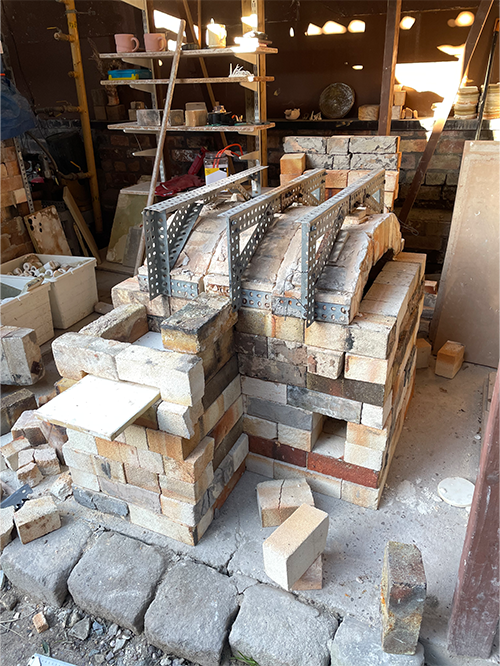
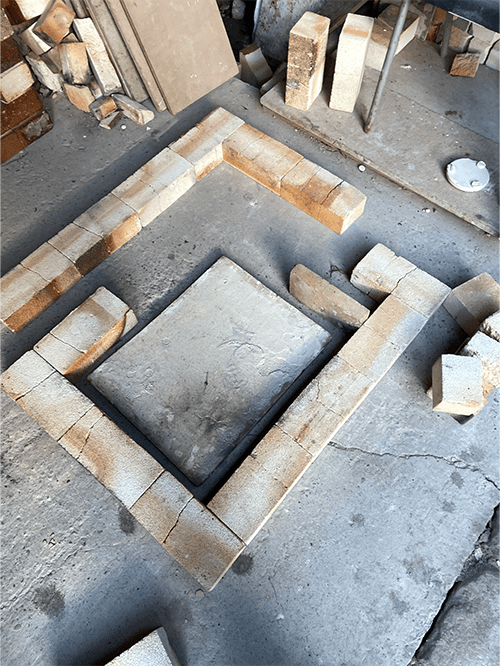
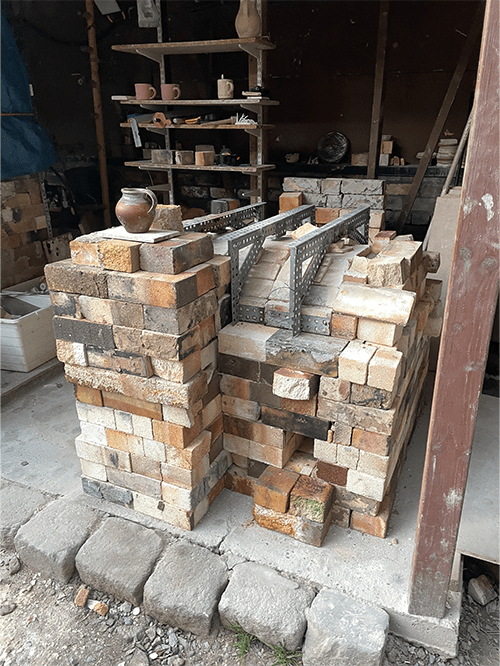
I changed my mind about the damper for the chimney, I had originally thought of using a large kiln shelf but given the condition of the bricks I didn’t trust them to be able to support it when it was pulled out, so I switched to using small pieces of kiln shelf on either side of the chimney – like wings! These dampers really added to the cuteness factor of the kiln. The pictures above show the original damper layout when I had dropper the arch pieces on to check everything is OK, and then the final damper arrangement and chamber’s first layer.
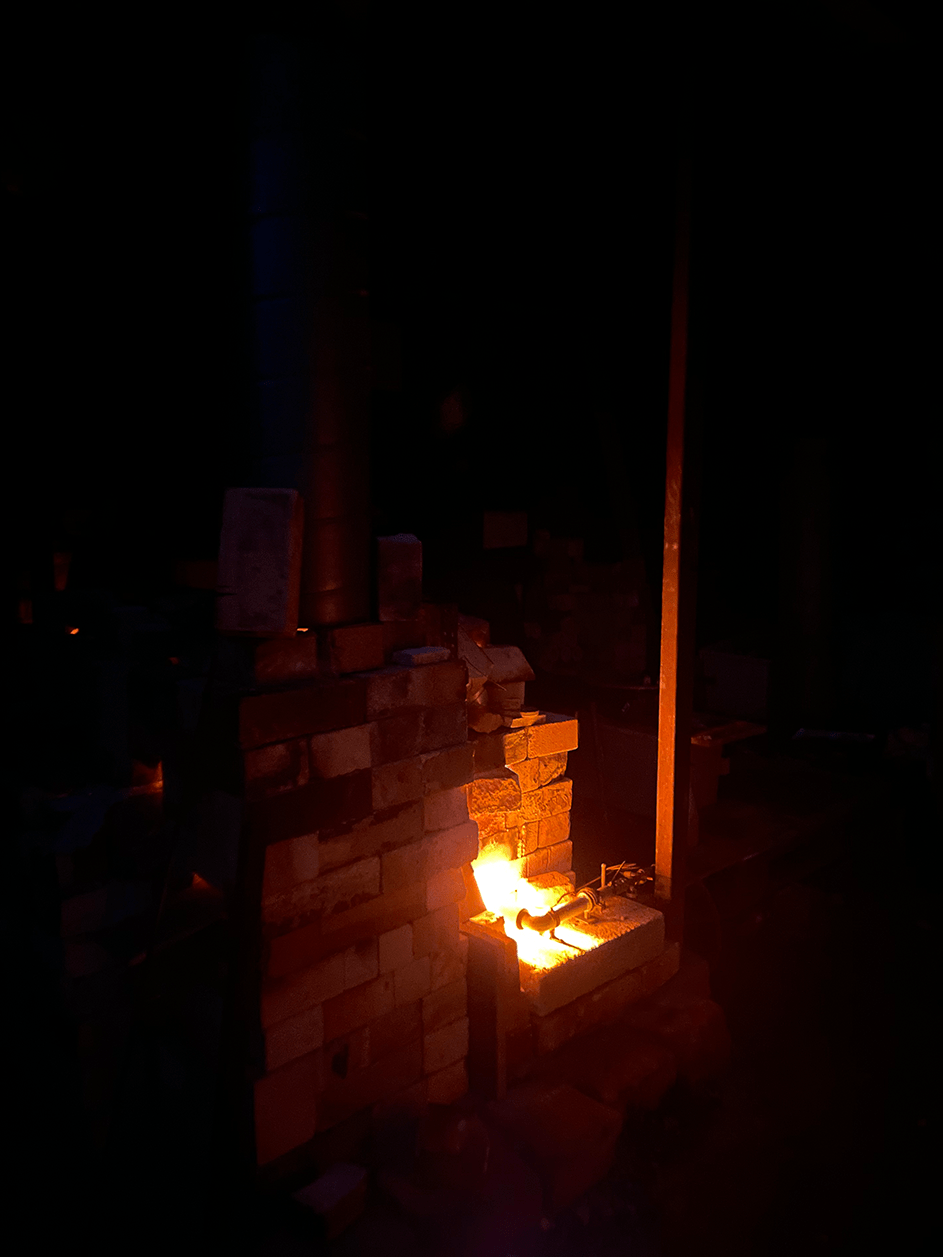
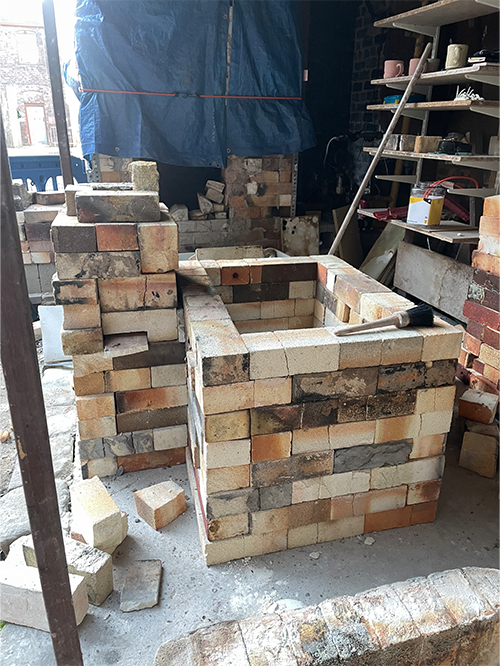
So here it is! Little Wobbler, complete with second skin of bricks making it a construction of 2 layers of 26 grade Insulating Fire Brick. If you thought the bricks on the inside skin were bad the ones I had to scavenge for the outer layer were ….. well shoddy to say the least! But that is where the kiln got its name.
Although from the outside it basically looks like a pile of bricks, the inside of the kiln’s construction was sound and the firings produced some very satisfactory results with only half a cones difference between top and bottom when fired to cone 10 in 6 hours.
The kiln was fired 9 times before the ordering of new bricks enabled a rebuild of an improved test kiln, which was constructed in February of 2024. The last firing I did in Little Wobbler was my first firing of my own clay bodies for soda, which set me off on the path that I am still pursuing today. I owe a lot to that little kiln and became quite attached to it. The fundamental principles of the design were rolled over to the new kiln, and so the current test kiln is a direct descendant of the Wobbler, and though less cute has proven a good kiln to test in and a design I would consider using in my practice in the future. It is a totally accessible design to build even if you only have modest space.

1 comment