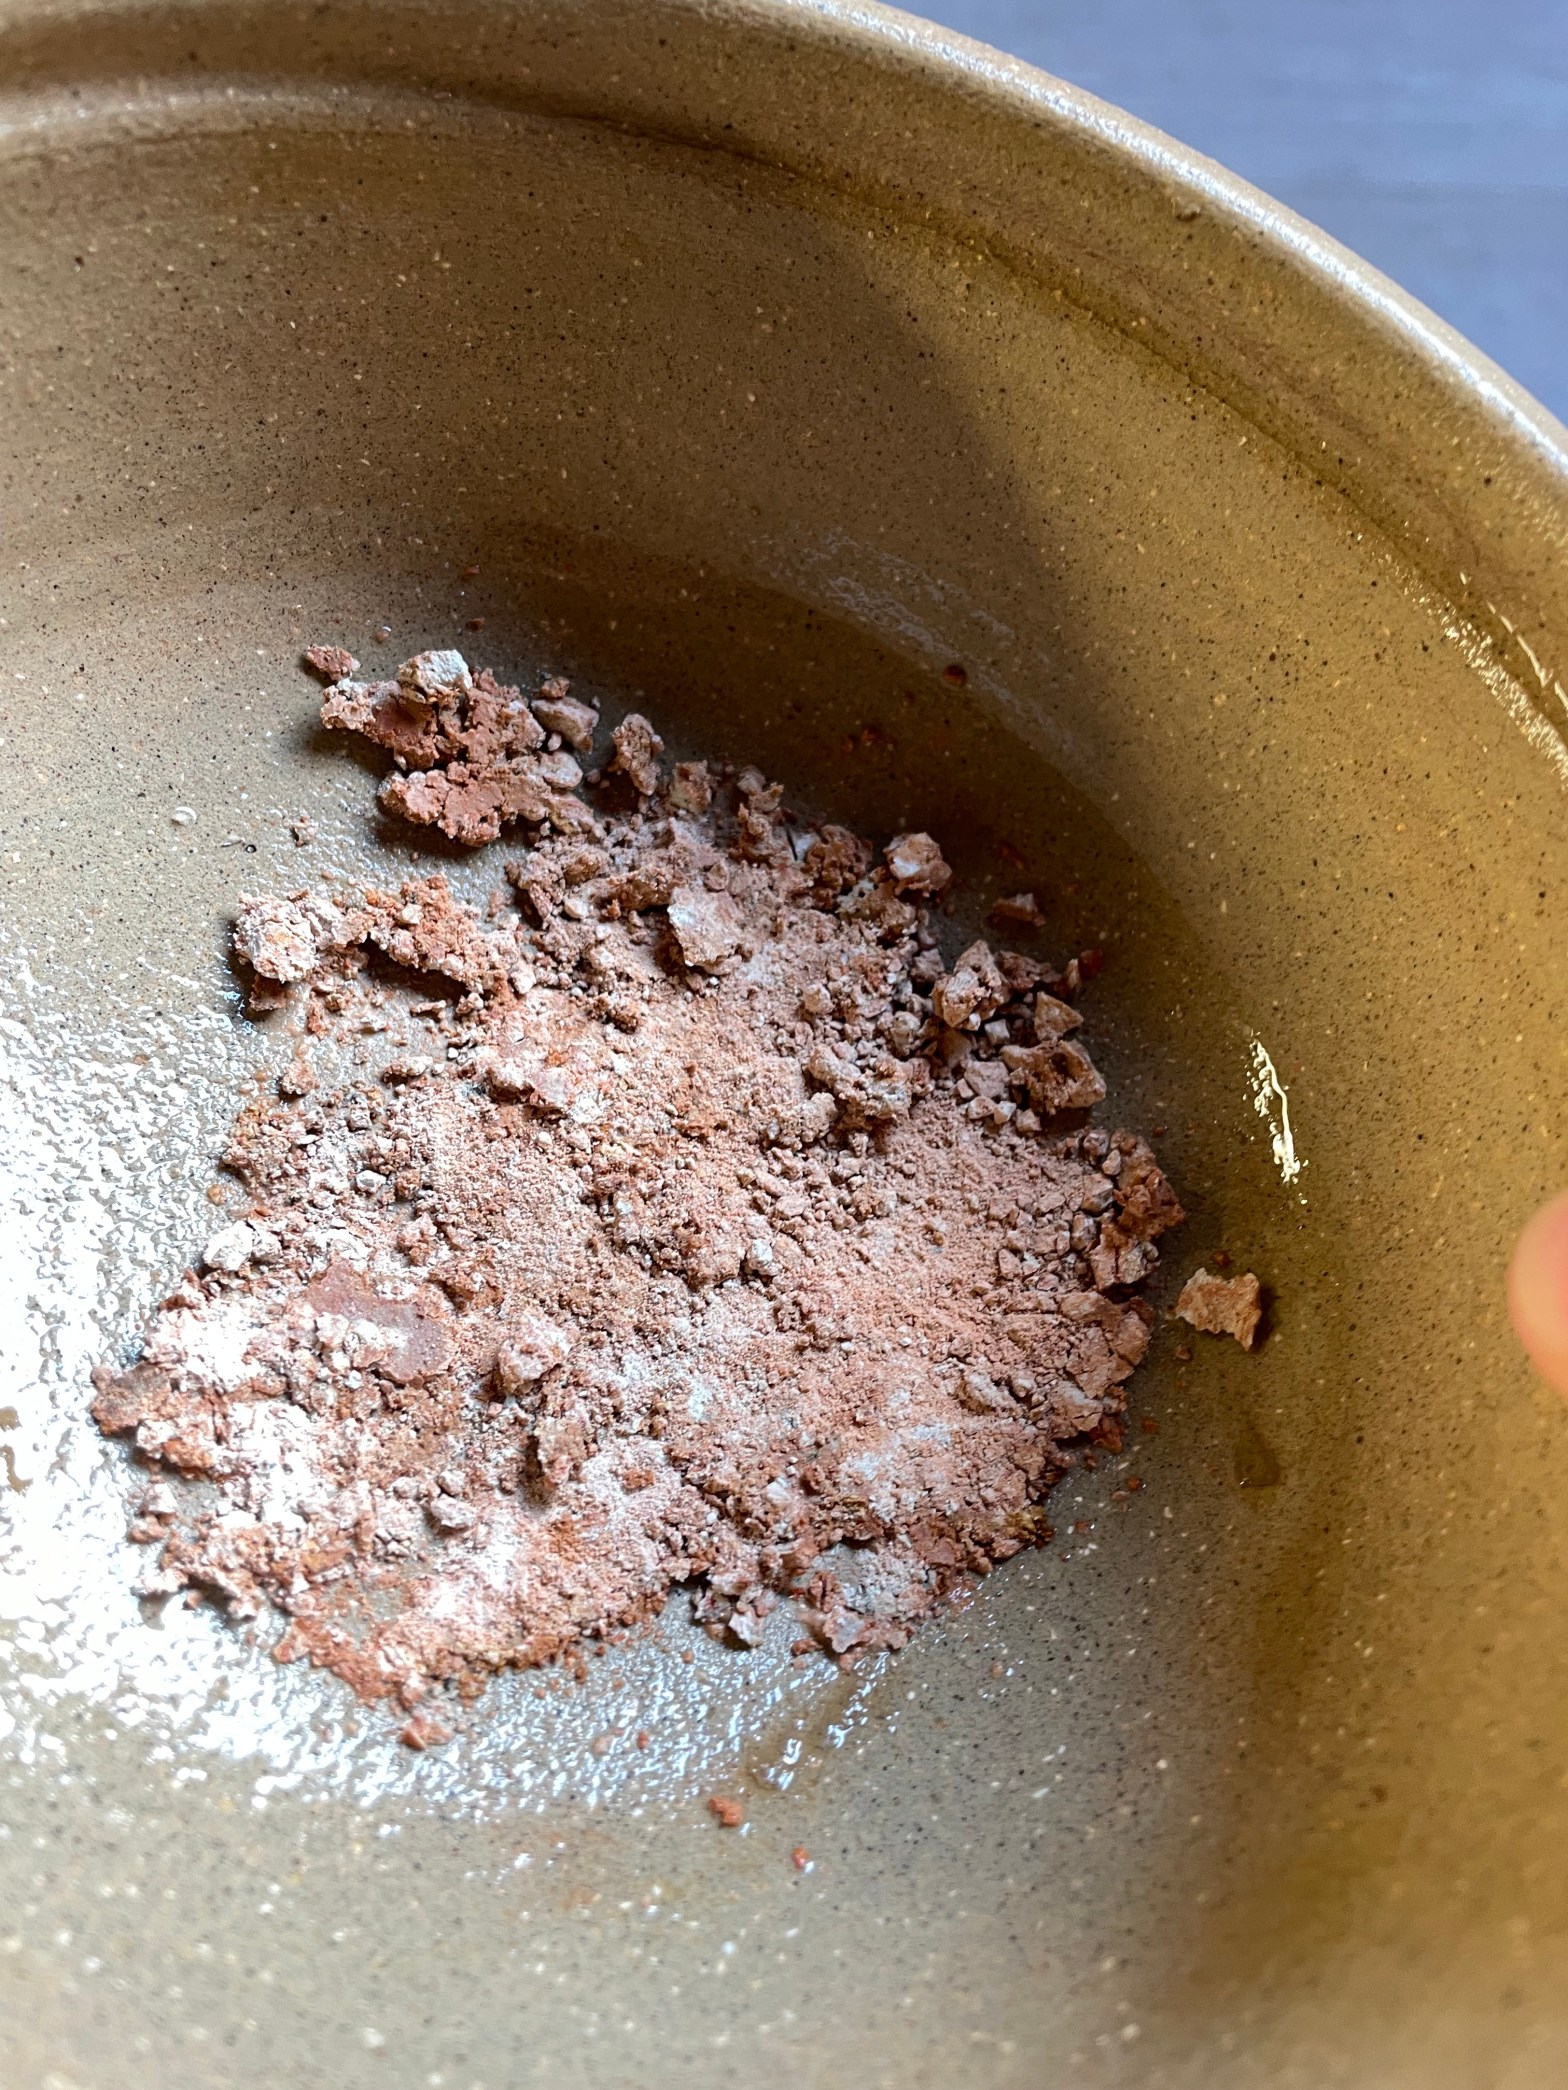
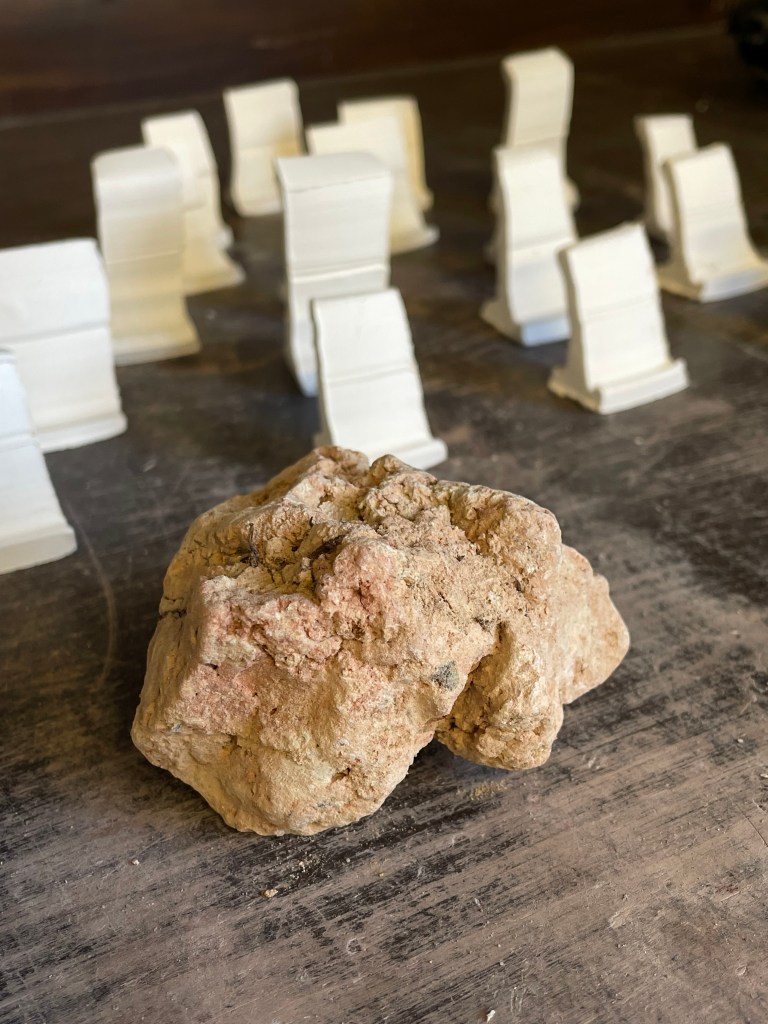
Sakura Tsuchi (lit cherry blossom clay), was how potter Ono-sensei described the clay he was drying out in a wonky Tudor-esque structure he was building near his kiln. The building came to exist because having bought wood from an old house demolition in Japan, with the intention of burning it in his kiln, he couldn’t bring himself to cut the charming beams and so decided to rebuild a structure from them. Unwilling to alter the wood in any way, he had to bend the walls of the home to match the curves in each beam. The inside, entirely unfinished, was covered in the pink Mashiko clay, which was drying out to be processed by the potter later. I glibly asked if I could take some back to the UK, and when he replied sure sure I had to quickly make sure he knew I wasn’t joking and would really take some and was he sure?! But he was, so I popped two clumps in my pocket.
Me and my friend Belle had ended up at this potters studio quite by accident, during a recent visit by the whole cohort of Clay College Stoke students to Mashiko, Kasama, and Tokyo, but that is a story for another time…
Now back in the UK with the clay I set about some rudimentary tests to make a glaze from it. I wanted to stick to the most simple of glaze combinations, allowing the clay to hopefully bring as much of the quality of the glaze as possible. I set up a simple triaxial blend between the Mashiko clay, ash, and feldspar. Readers not familiar with triaxial testing may want to read my guide on how to set one up, but that’s not necessary to enjoy this post (:
I presumed that the feldspar and clay blends would not melt as much as the clay-ash blends (in hindsight I have no idea why given that I knew absolute nothing about what temperature the Mashiko clay fires to, but it is a weakness of mine that I can sometimes make assumptions without thinking about why!!!), but I wondered if perhaps some interesting textural slip-like finishes might be found there. The ash and clay blends are well trodden territory but often provide fruitful ground for glazes, and the central section containing blends of Feldspar, clay and ash in varying proportions was almost certain to produce some usable glazes at cone 10 in oxidation and reduction.
Here are some of the results, and how I set up the testing
Triaxial set up
This triaxial uses 100% of each of the three ingredients in the corners. I mixed 75 grams of each in to 100 ml of water, then passed through a 100 mesh sieve twice. As the blending is to be done by volume, it is very important to make sure that the same quantity of water was added to each corner. There was a high proportion of sand in the Mashiko pink clay, which I sieved out and retained to add to clay later. This weighed in at 2g, so in hindsight I should have adjusted the other corners down to 73g but it is a level of inaccuracy that I am happy to tolerate(!) I usually do an odd number of steps between the corners when making a triaxial, but for the purposes of this one I decided that four steps would give me an expanded yet manageable central section containing 6 glazes of the three part blends, and would also hone in around tried and tested ratios of the glaze ingredients.
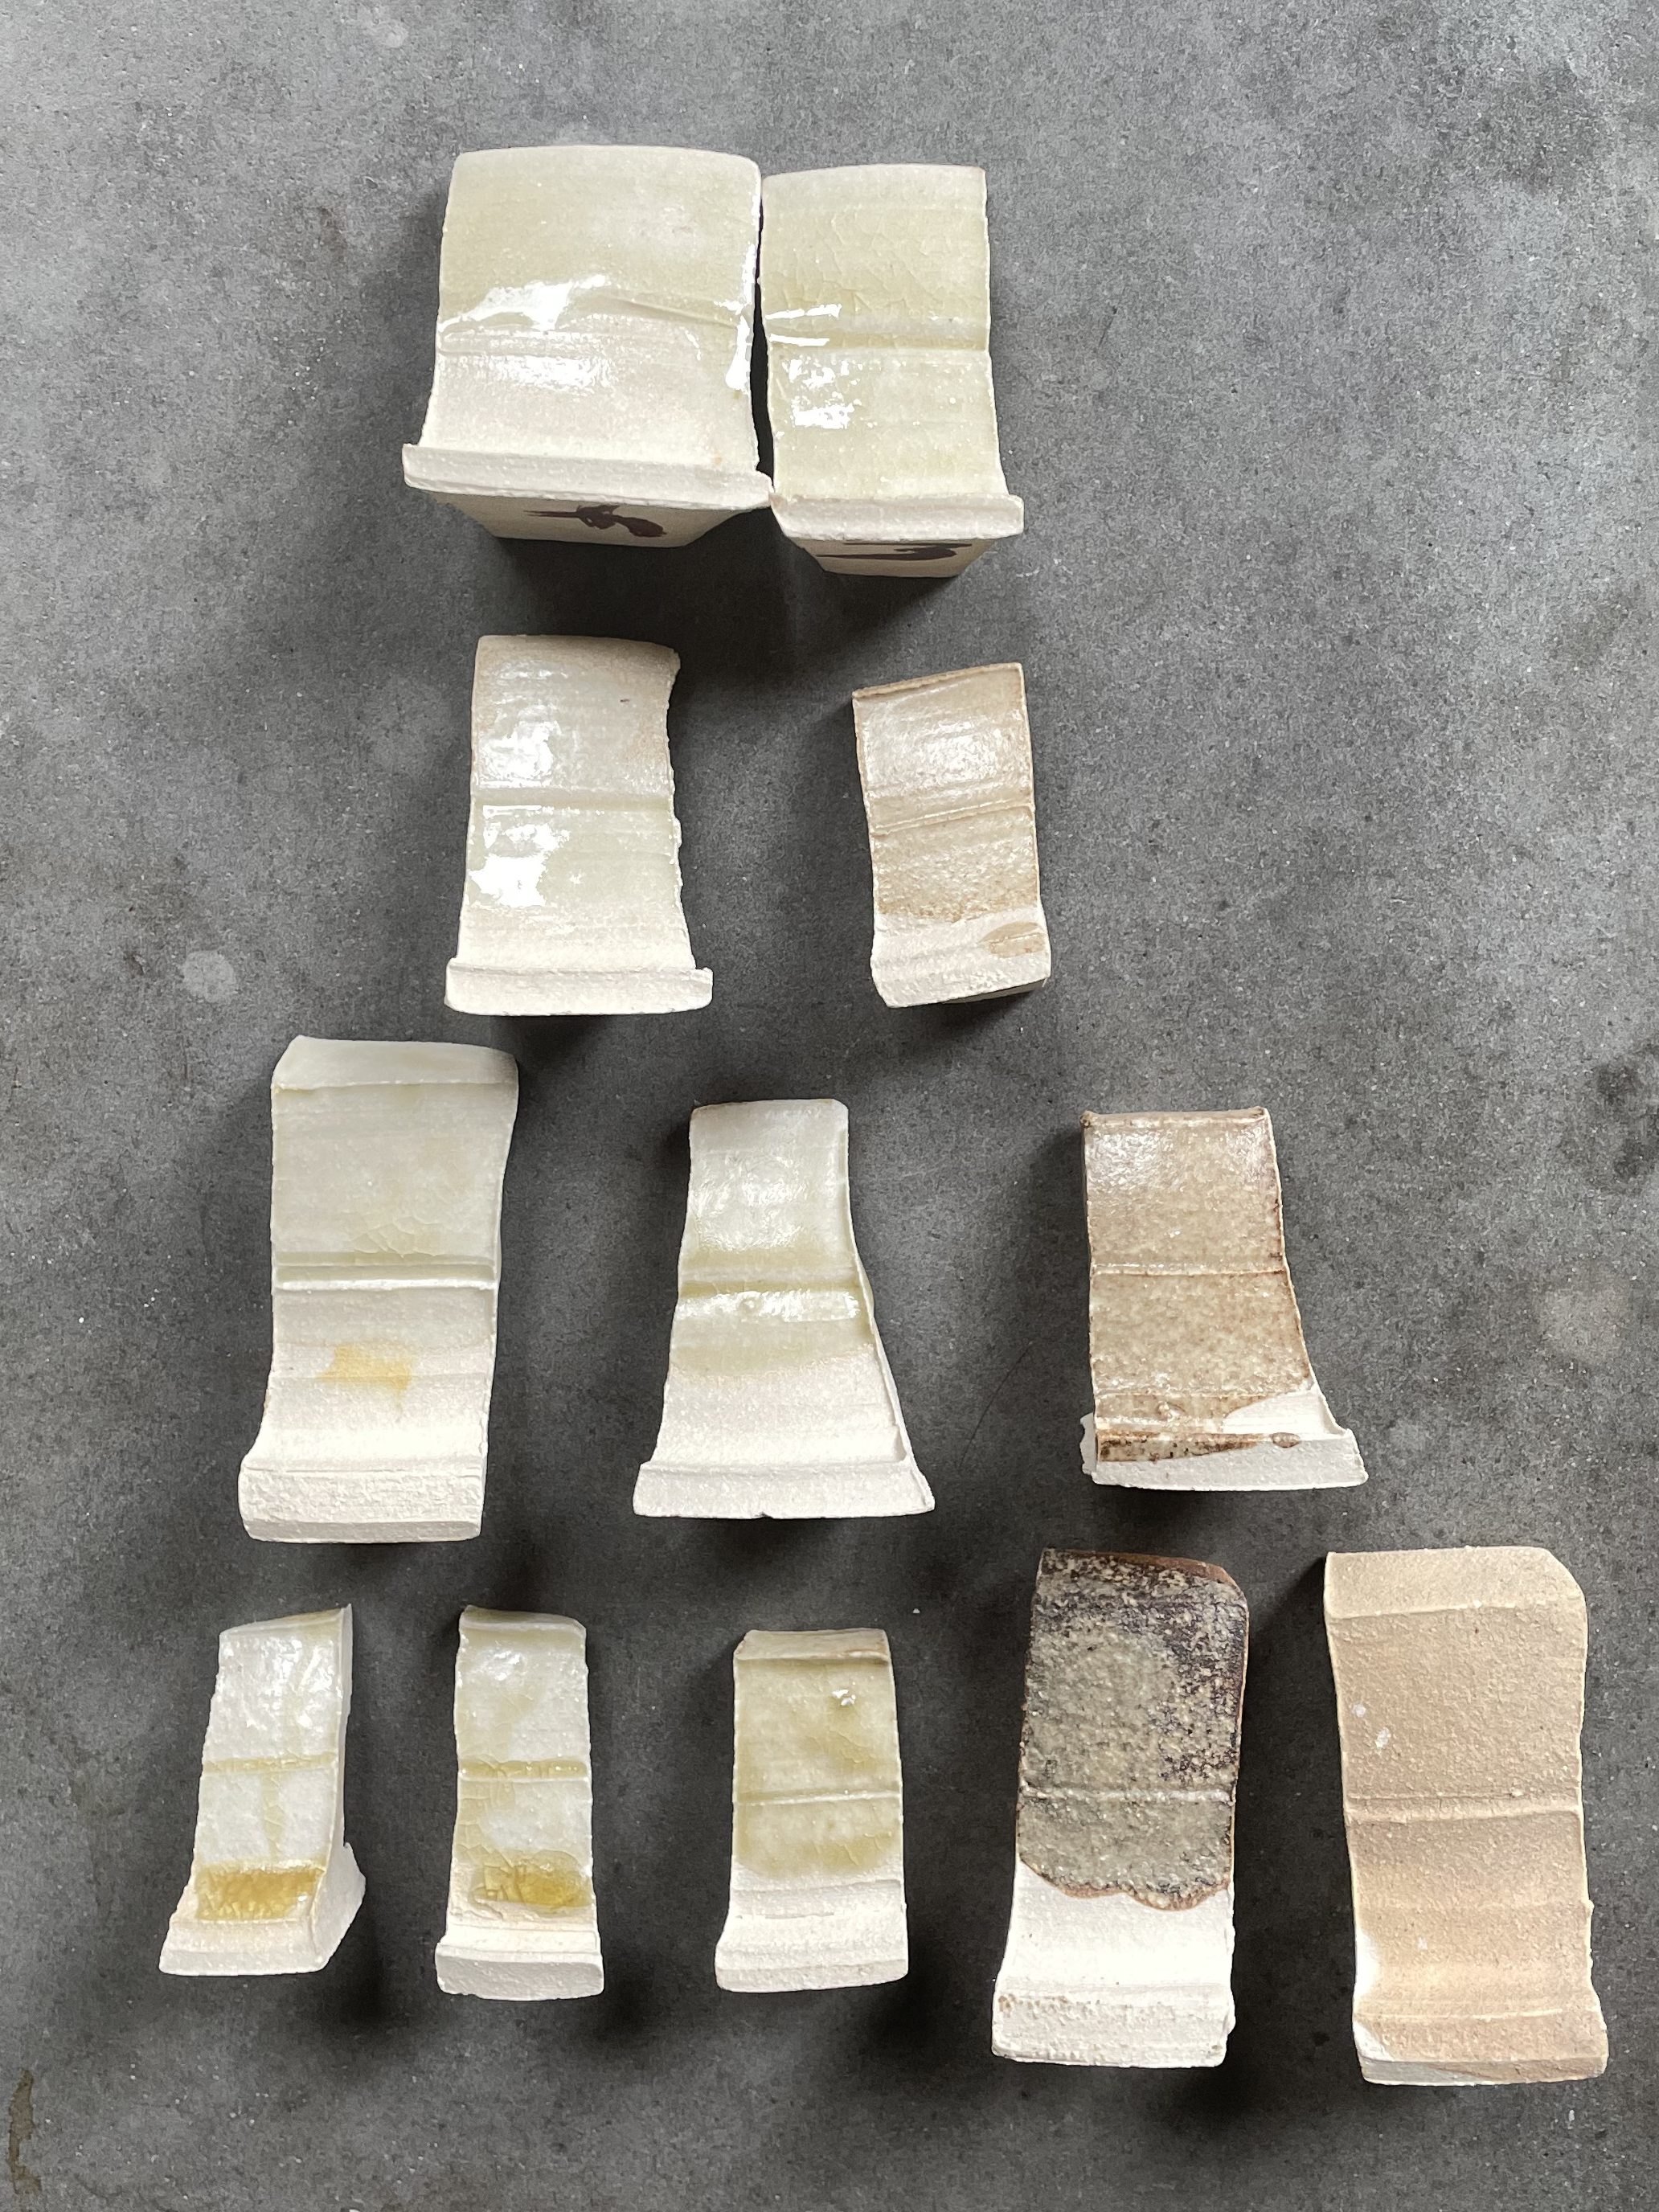
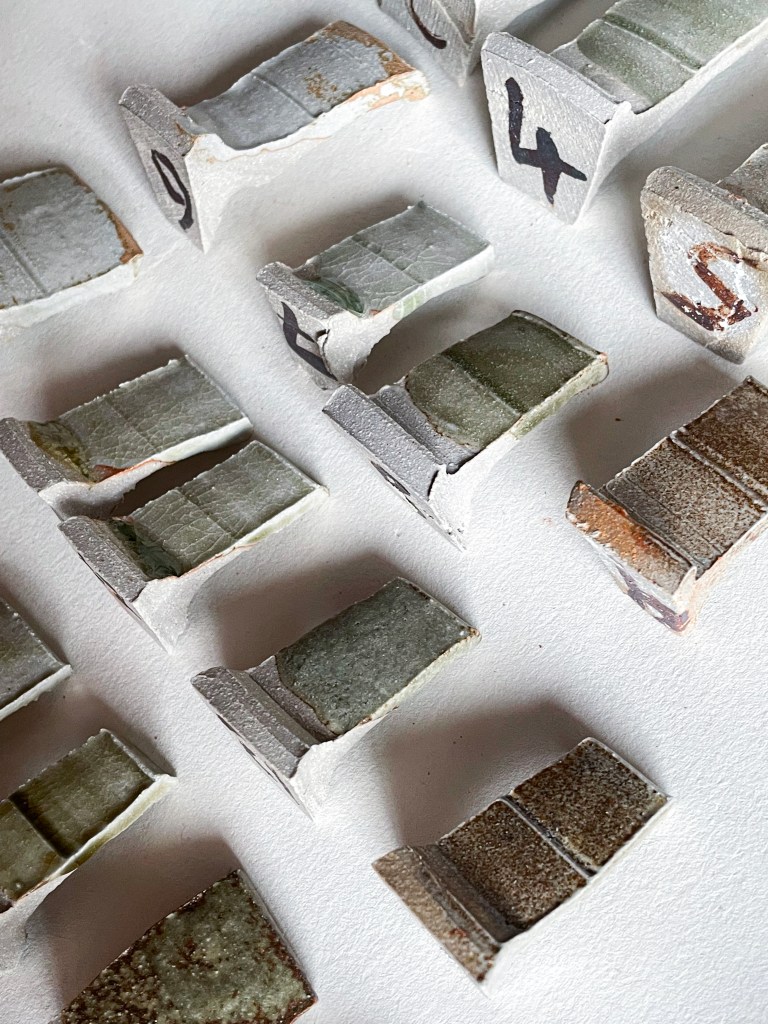
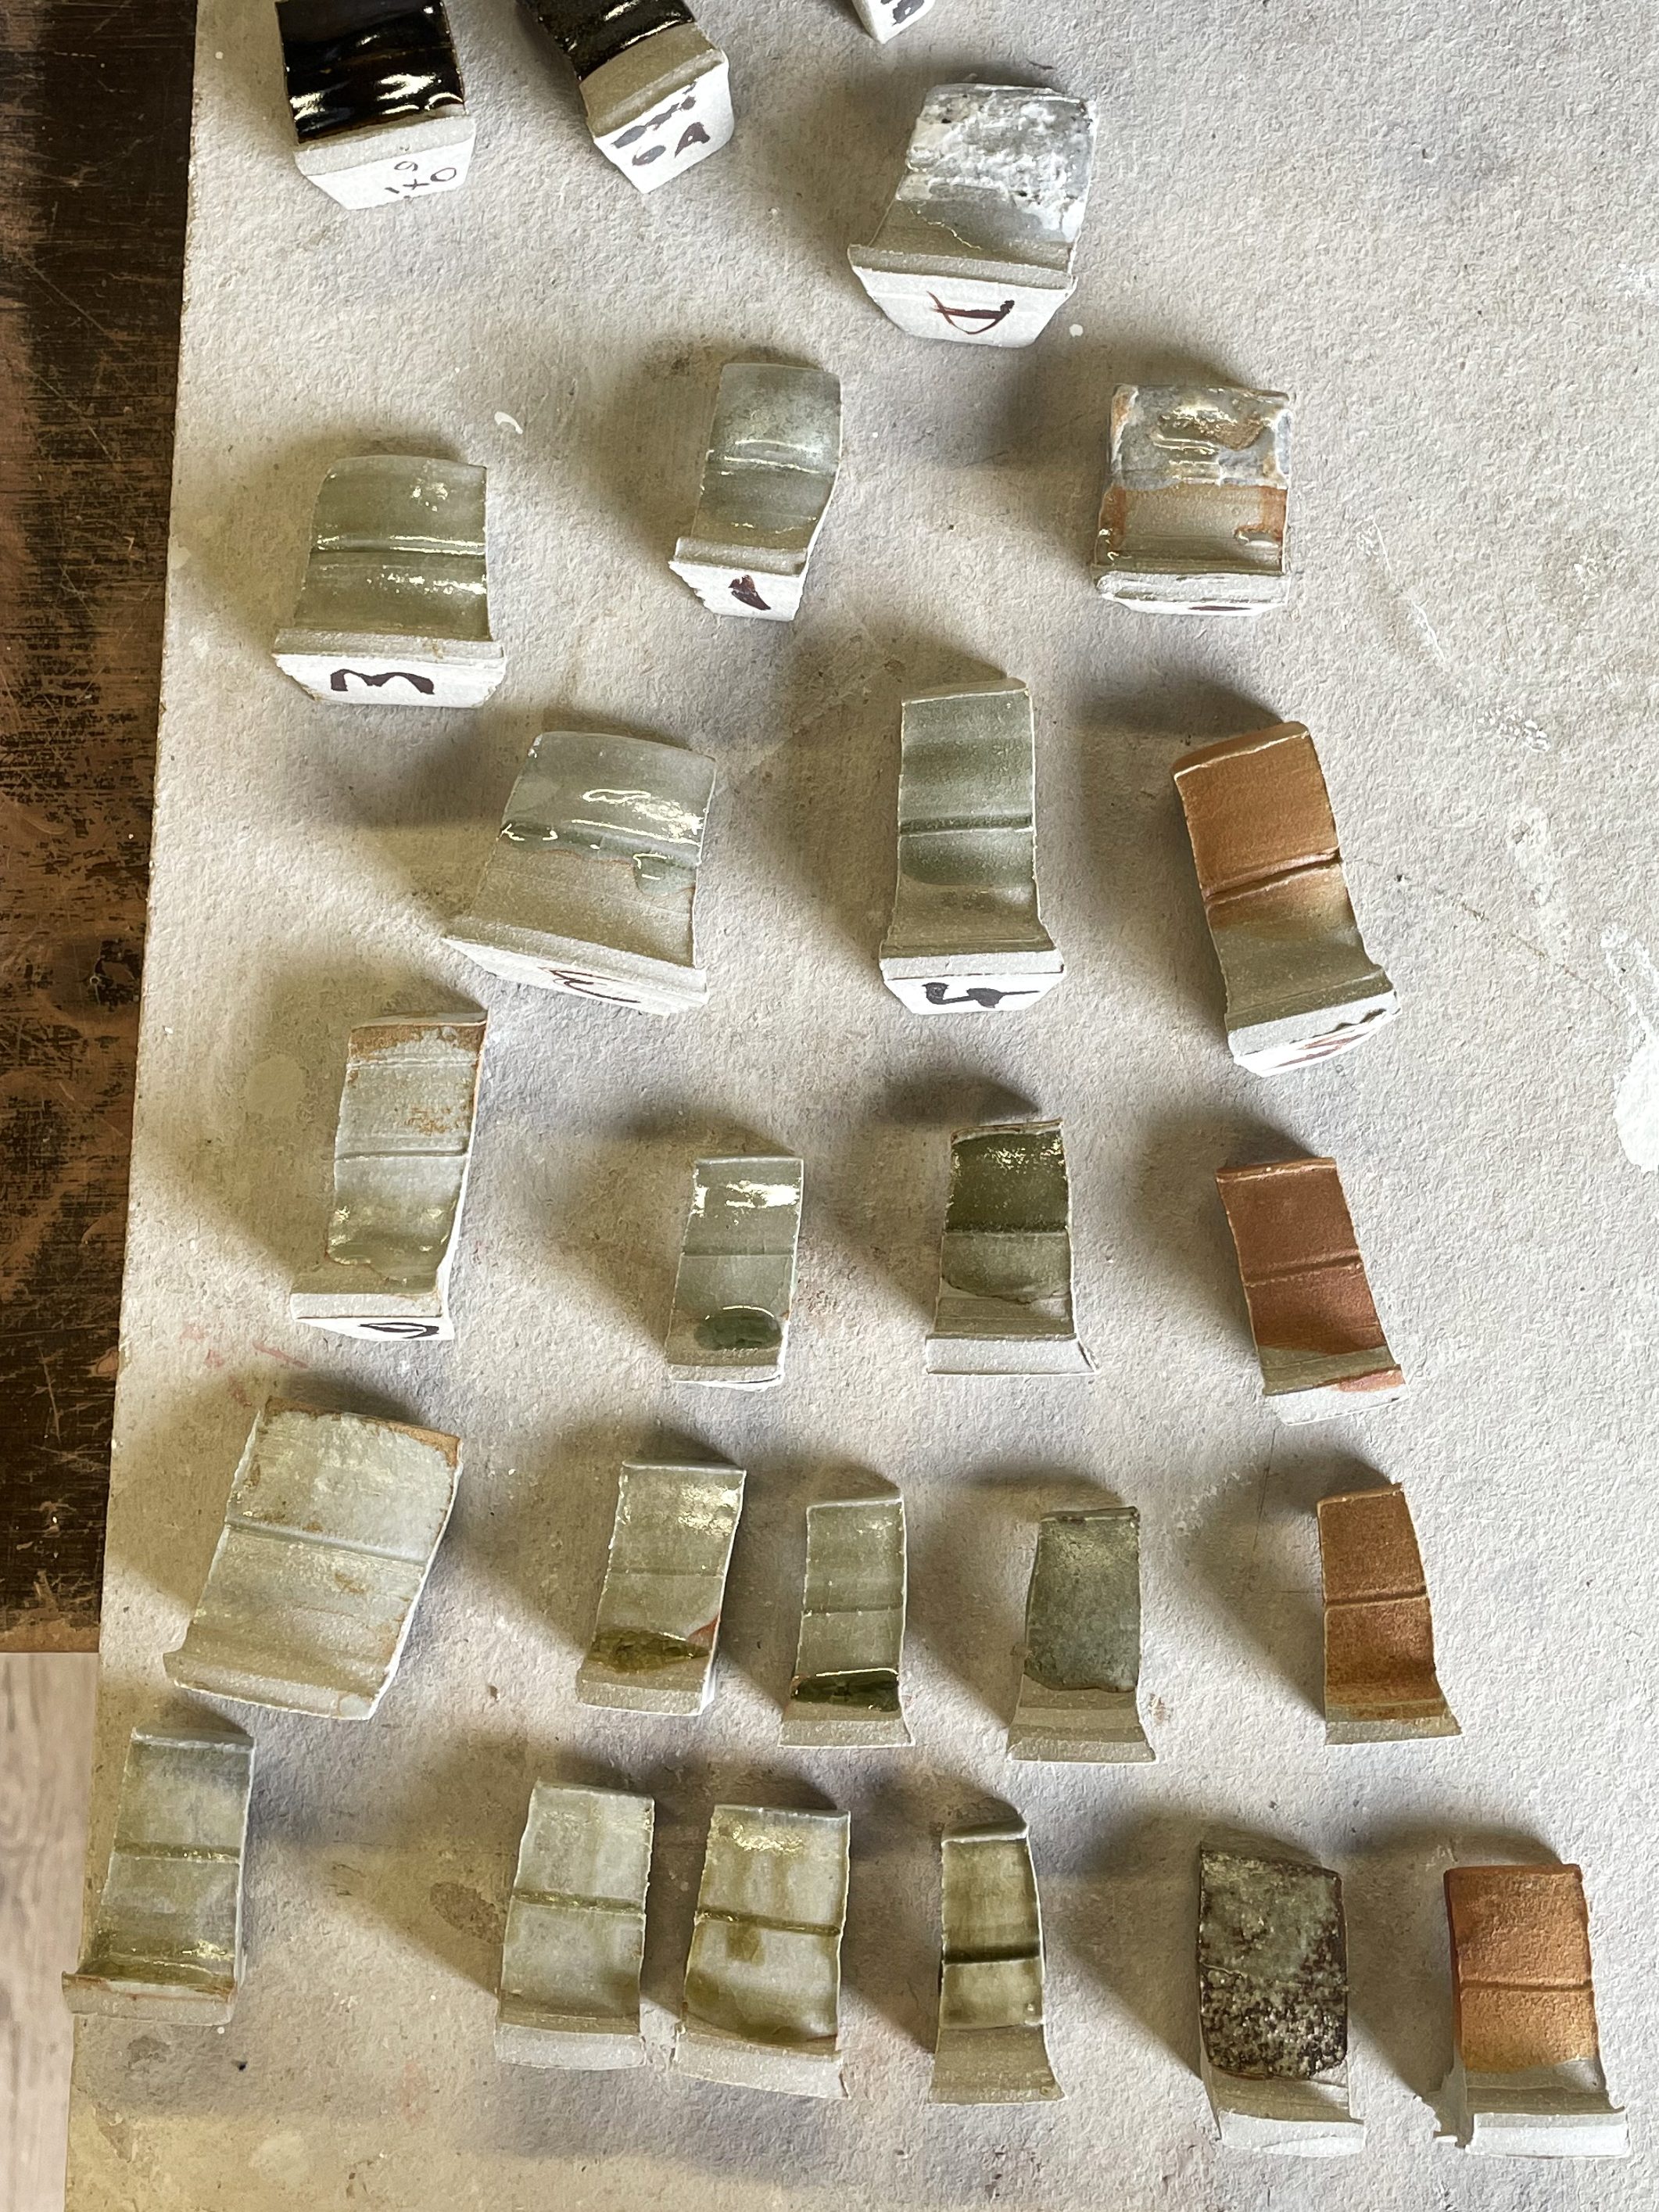
Image 1
part triaxial, fired in an electric kiln slowly to cone 10
Image 2
part triaxial, fired hot and fast to cone 10 in a medium reduction. The two tiles on the bottom right had been retired in a salt kiln to cone 11 at the time this photo was taken
Image 3
full triaxial, gas fired hot and fast to cone 10 with medium reduction. Look at the amazing colours on the right hand side!!
Readers familiar with triaxial testing will have already realised, that six of the glazes would not contain any Mashiko clay at all – and for why! You must wonder… I had thought about omitting the line blend between the ash and the feldspar but decided in the end to keep it in for the sake of comparison, and as I haven’t done a bend between the particular feldspar I was using and ash yet there was no harm in keeping it in. However you could simply do the triaxial without this blend if you wished. For the same reason I did not dip tiles in the 100% ash or 100% feldspar for the oxidation version as the chances of these producing anything remotely workable are slim indeed.
Many of the ash heavy results tended in to a fairly predictable camp of nice glossy greens, but the quality of the clay was, in my opinion, lost, despite some lovely glazes coming out. Lots of other ash and clay blends look fairly similar. Where the results were most interesting where where the clay was heaviest, and surprisingly the clay dipped on to a bisque tile proved to be really cool and fused well on to the clay body without shrinking too much. Because of this and some unfortunate timing of a salt firing at clay college, I immediately re-fired the clay-feldspar blends in salt the moment they came out of reduction and basically didn’t take very good reference photos at all. They looked great in reduction and in salt, and a potentially interesting shino came out of these very rudimentary test.
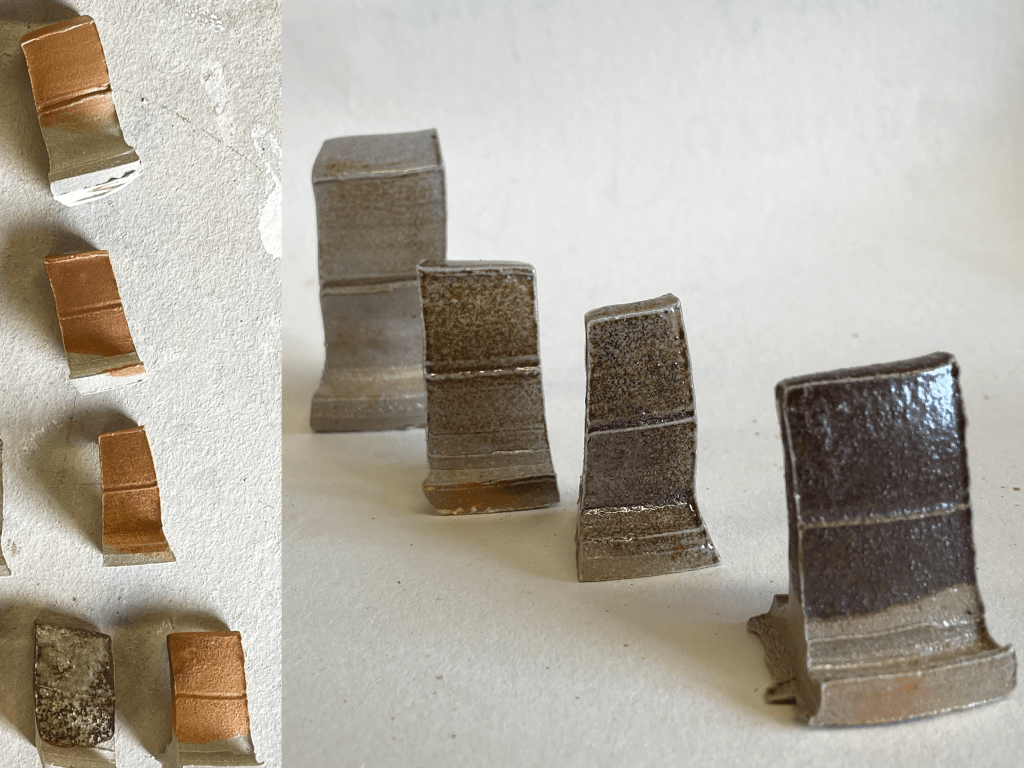
These two photos show the same tiles, on the left they are as they were when they came out of a quick gas firing. On the right is how they look after a light salt firing. Can’t wait to use some of these surfaces on my work!
