I love testing using triaxials: you prepare the three corners, and blend between them, and before you know if from three you suddenly have as many glazes as you wish! They have some limitations – for example when it comes to testing materials you are better off setting up a test such as a quadraxial, which we will leave to another time. An excellent explanation of testing materials in that way is available in Matthew Blakely’s wonderful book on rock glazes.

Tiaxials are best, in my opinion, to quickly test lots of colouring oxides in to a good base glaze. But they are also extremely useful to adjust existing recipes where glaze faults are found. Being reliably simple in setup and quick to get the hang of, learning how to test by way of triaxial is something every potter should get to grips with – and hopefully this post will give you the confidence to get started.
Before we get on to what these tests are and why we should do them I wanted to take a moment to stress that testing is only worthwhile when we have a good idea of what we are trying to achieve. Lets say you have a nice copper green glaze recipe, but you find the surface quality in some way deficient. Maybe the glaze is too translucent, or too satin, or perhaps you just want more variation in the colour. Starting with these in mind you can start to set up your test. I’ll lay out an example of how you can do this.
Test Example
We are going to be testing the effects on the surface of the glaze by introducing two variegators in to our glaze recipe: titanium, and rutile. Let’s say the glaze we are investigating is a glossy glaze with 2% copper carbonate in it. This will be glaze A in our test.
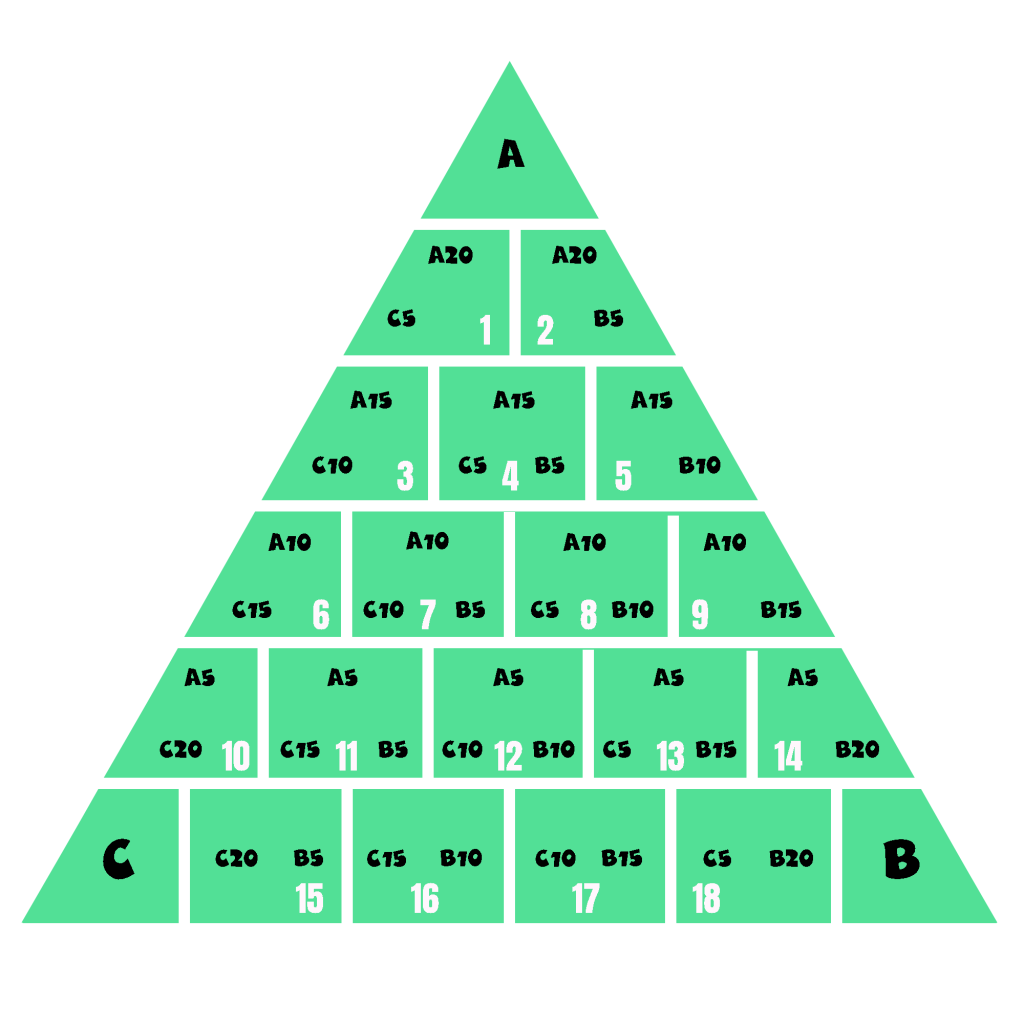
In position B, we are going to have the same recipe as A, but we will add 15 titanium. In position C, we will have the same recipe as A, but we will add 10 rutile. Now, we will get a total of 21 glazes all with 2% copper carbonate, but with varying amounts and proportions of titanium and rutile: from which we can find exactly how we want our variation in the glaze surface to look like. In this test, we have four steps between each corner glaze, but this could be three (for 15 glazes in total) or as many steps as you wish! I tend to either do three or four steps depending on what I am doing.
Mixing the test
To mix the test, you’ll need:
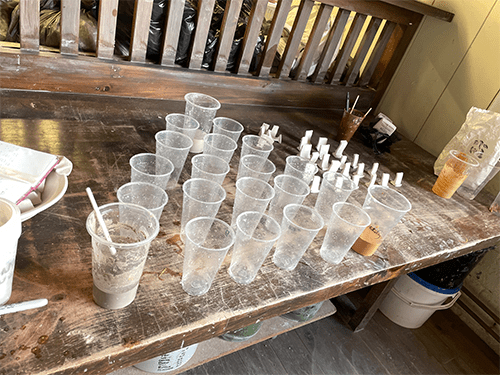
21 plastic cups, including three larger ones for the corners
A 60ml syringe
Paintbrushes (for mixing the glazes)
100 mesh sieve
Weighing scales
Respirator
Marker pen (to label cups)
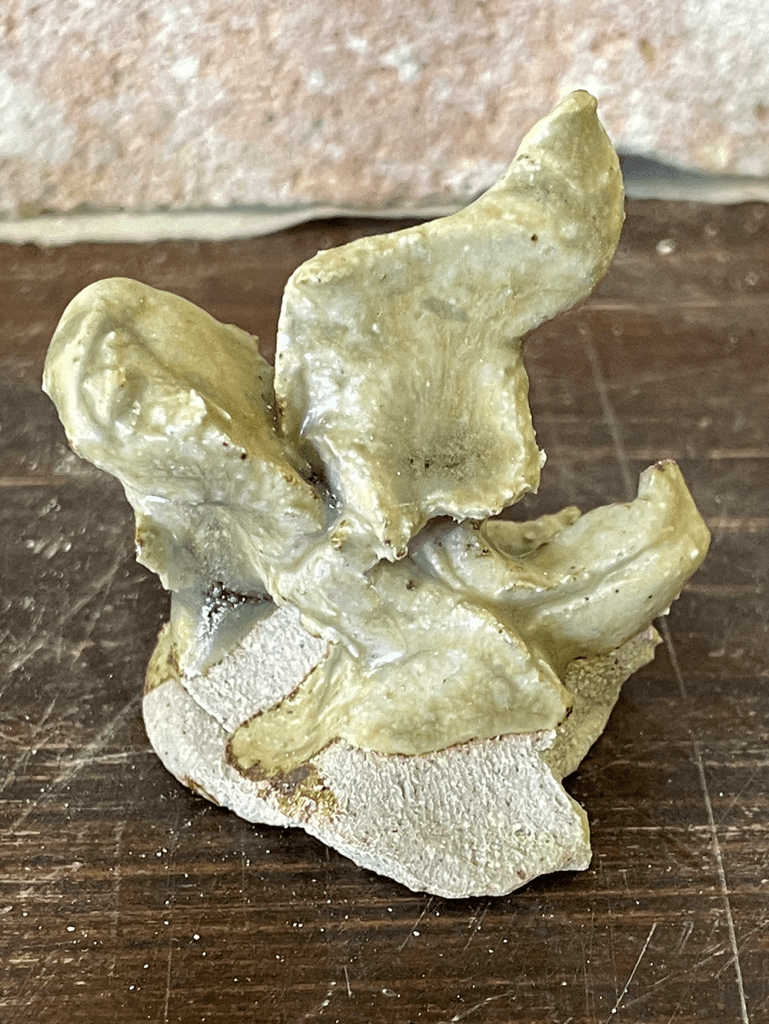
Test tiles (I suggest angled tiles. Remember to reflect what your work is like in your test tiles – there is no point in throwing the test ring if you are planning on using the glaze on a hand built pot!! If you want to see how the glaze breaks and pools very clearly you can make your test tiles by simply squishing clay in the palm of your hand like the photo below)
How much of the corner glazes you mix up is largely a point of personal preference, and we must balance workability with being conscious of our material use. These days I make up the corner glazes using very small amounts of materials, but for this example we will make up 200g of glaze in each corner. We will use my cone 10 base glaze recipe (you’re welcome people 😉 ) in this example:
Glaze A
FKN-45 Feldspar 35.1
Wollastonite 19.9
Magnesium carbonate 2.25
Grolleg Kaolin 14.5
Quartz 28.2
+ Copper Carbonate 2
Glaze B
FKN-45 Feldspar 35.1
Wollastonite 19.9
Magnesium carbonate 2.25
Grolleg Kaolin 14.5
Quartz 28.2
+ Copper Carbonate 2
+ Titanium Dioxide 15
Glaze C
FKN-45 Feldspar 35.1
Wollastonite 19.9
Magnesium carbonate 2.25
Grolleg Kaolin 14.5
Quartz 28.2
+ Copper Carbonate 2
+ Rutile 10
Step 1
Weigh out 170g water in to each of the three large cups. Being EXACT with the amount of water in each cup is critical to the success of the test.
Our recipe adds up to 100 so we have to double it to get our 200g of powder. Make sure you always mix powder with a respirator on and remember that dust will stay airborne for many hours after you have mixed a glaze up – so ideally do all your dry powder work outside or under extraction. Add these materials to each of the corner cups (with the clay going in the cup first to help suspend the other ingredients)
Sieve each cup individually. If you think the glaze needs more water, add some very slowly using a syringe. If you add 10ml to one glaze, make sure you add it to all three or else the accuracy of the test will be compromised. Place your sieved glazes in the corners of the triangle shape
Place the empty (clean) cups between the corners as shown.
We are now ready to blend. Blending is done by volume, so we need our 60ml syringe
Working in rows, one glaze at a time, we are going to draw up glaze A in to the syringe, and place 20ml in each of the two nearest cups. The easiest way to do this is to draw up 50ml of glaze, and then deposit 20 each in to the two cups. We don’t draw up 40ml as there is always some air in the syringe which will throw the accuracy of the test. We then place 15ml in the next row. Then 10. Then finally 5. You’ll notice that none of glaze A is mixed in to the bottom row.
We then continue to do the same procedure with glaze B and C, working from the cups closest to the corner and fanning outward. Each cup is then stirred very thoroughly with a paintbrush before dipping the test tile. Remember to clean your brush between each mix! All test tiles should be labelled using red iron oxide and water for easy reference later, matching its position on the grid. It is good to dip the top part of the tile twice so the effect of glaze thickness can also be recorded.
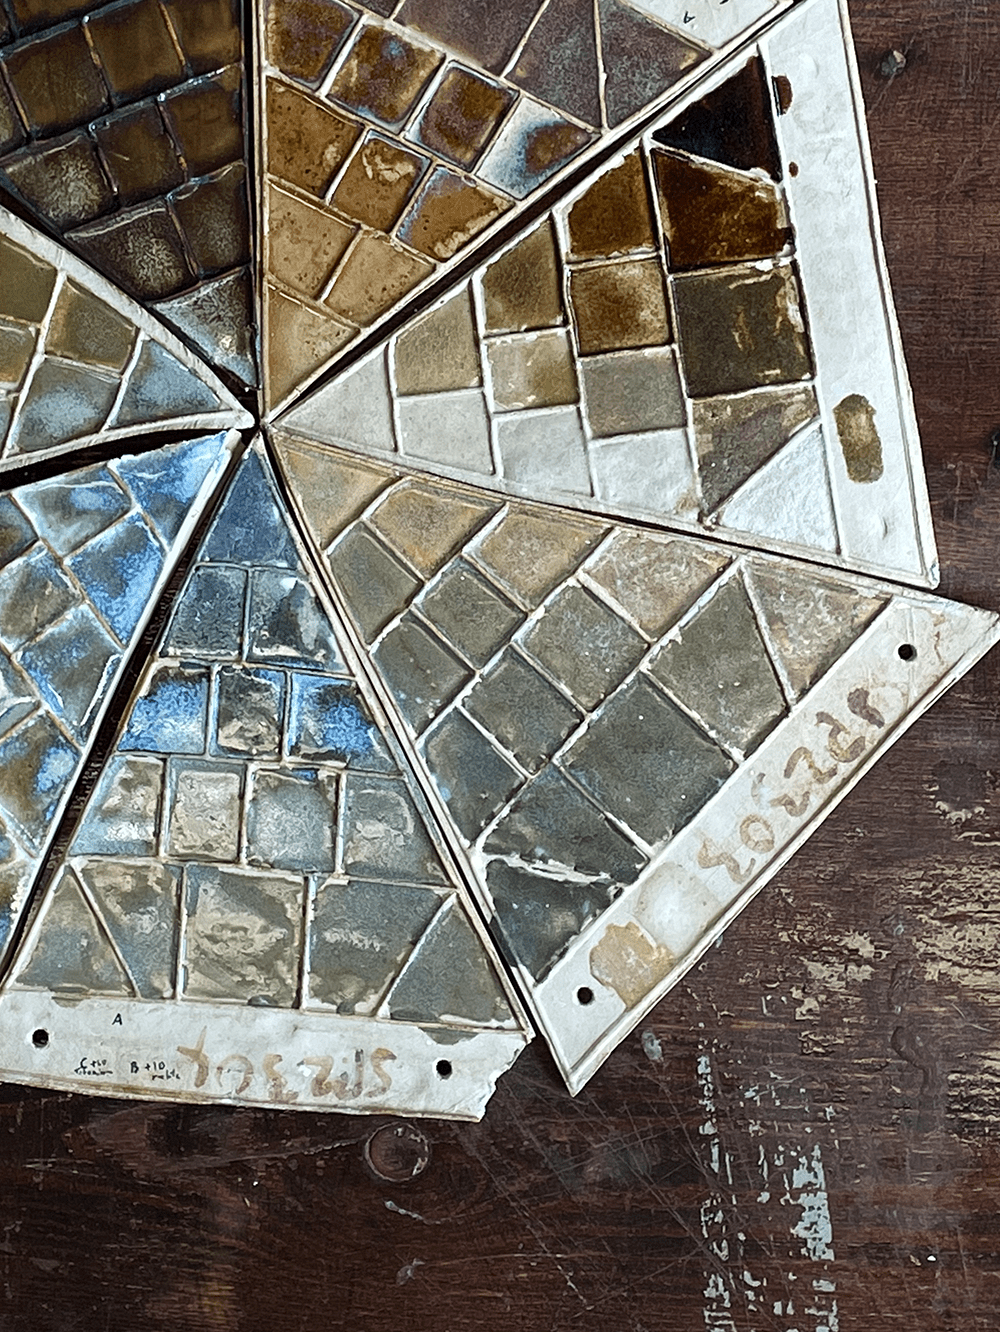
You’ll notice you have plenty of glaze left in each cup after you have dipped your test tile. It is no extra effort to keep several sets of test tiles available, in different clay bodies, or perhaps experiment with slips. You can then dip multiple sets of tiles in the same triaxial and instead of just 21 glazes in one go you can achieve many more! Here is an example of the same triaxial done on the clay body, with a black slip, and with a porcelain body slip. You can click the images to enlarge them.
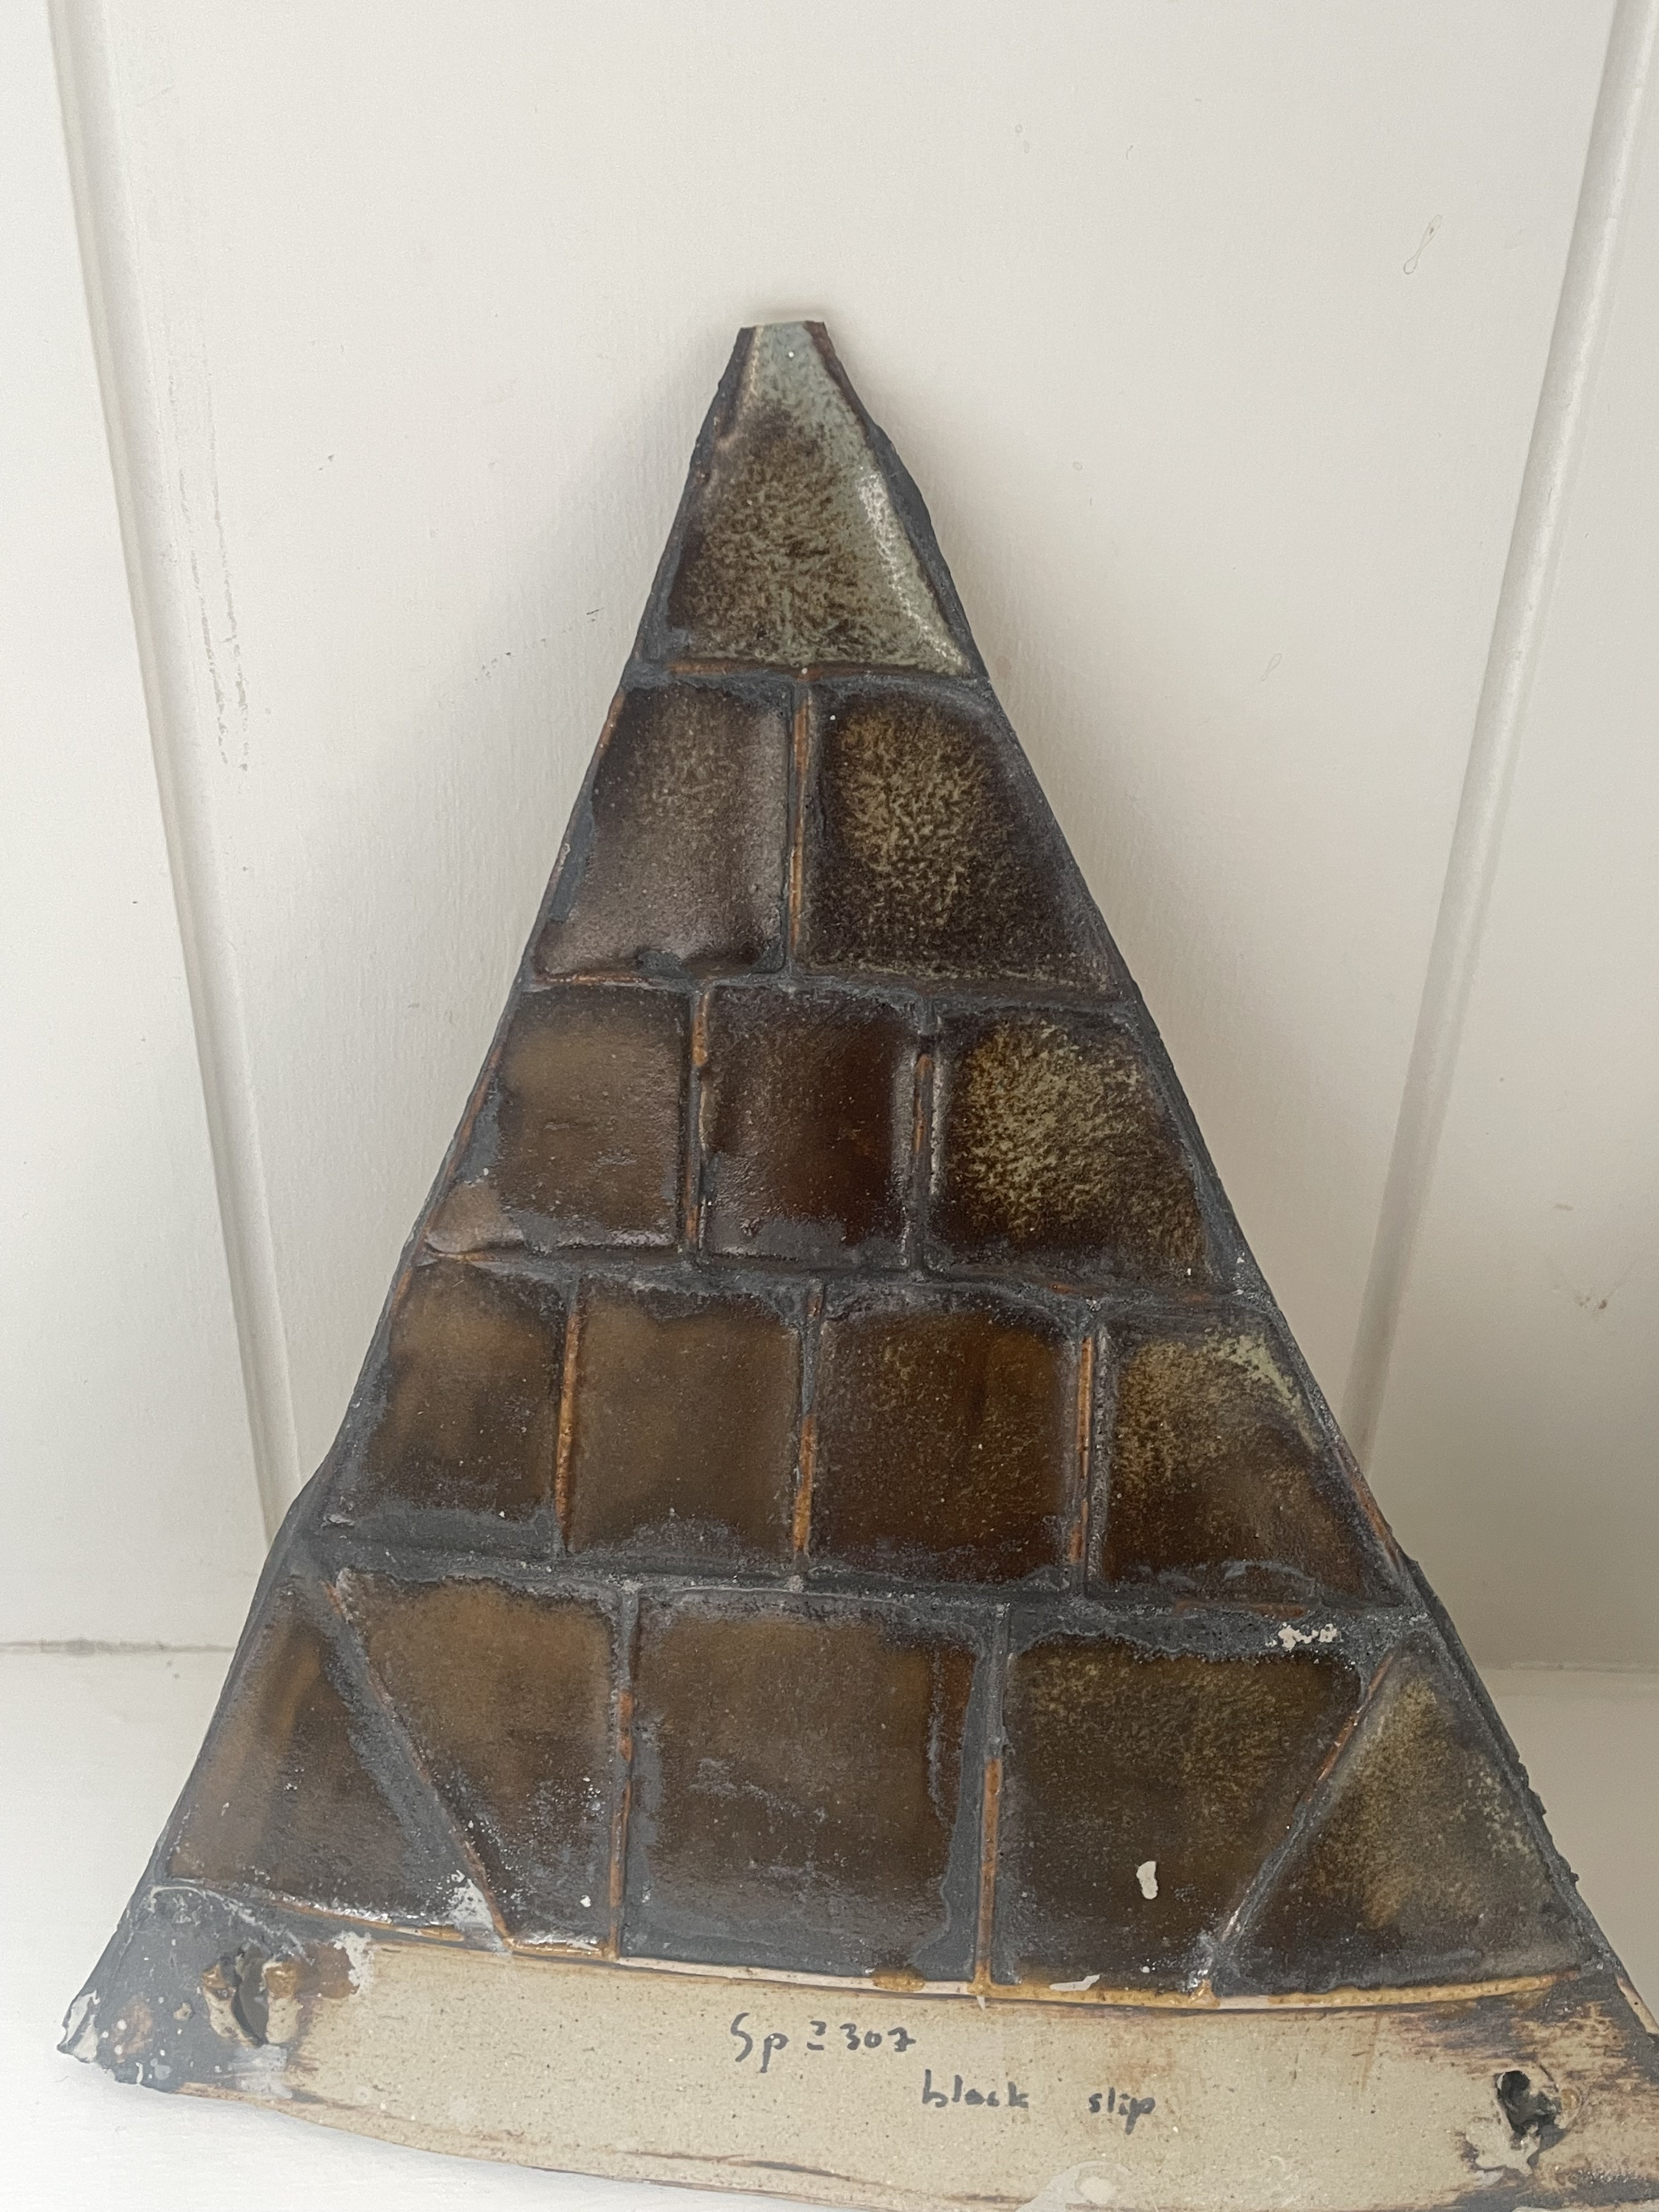

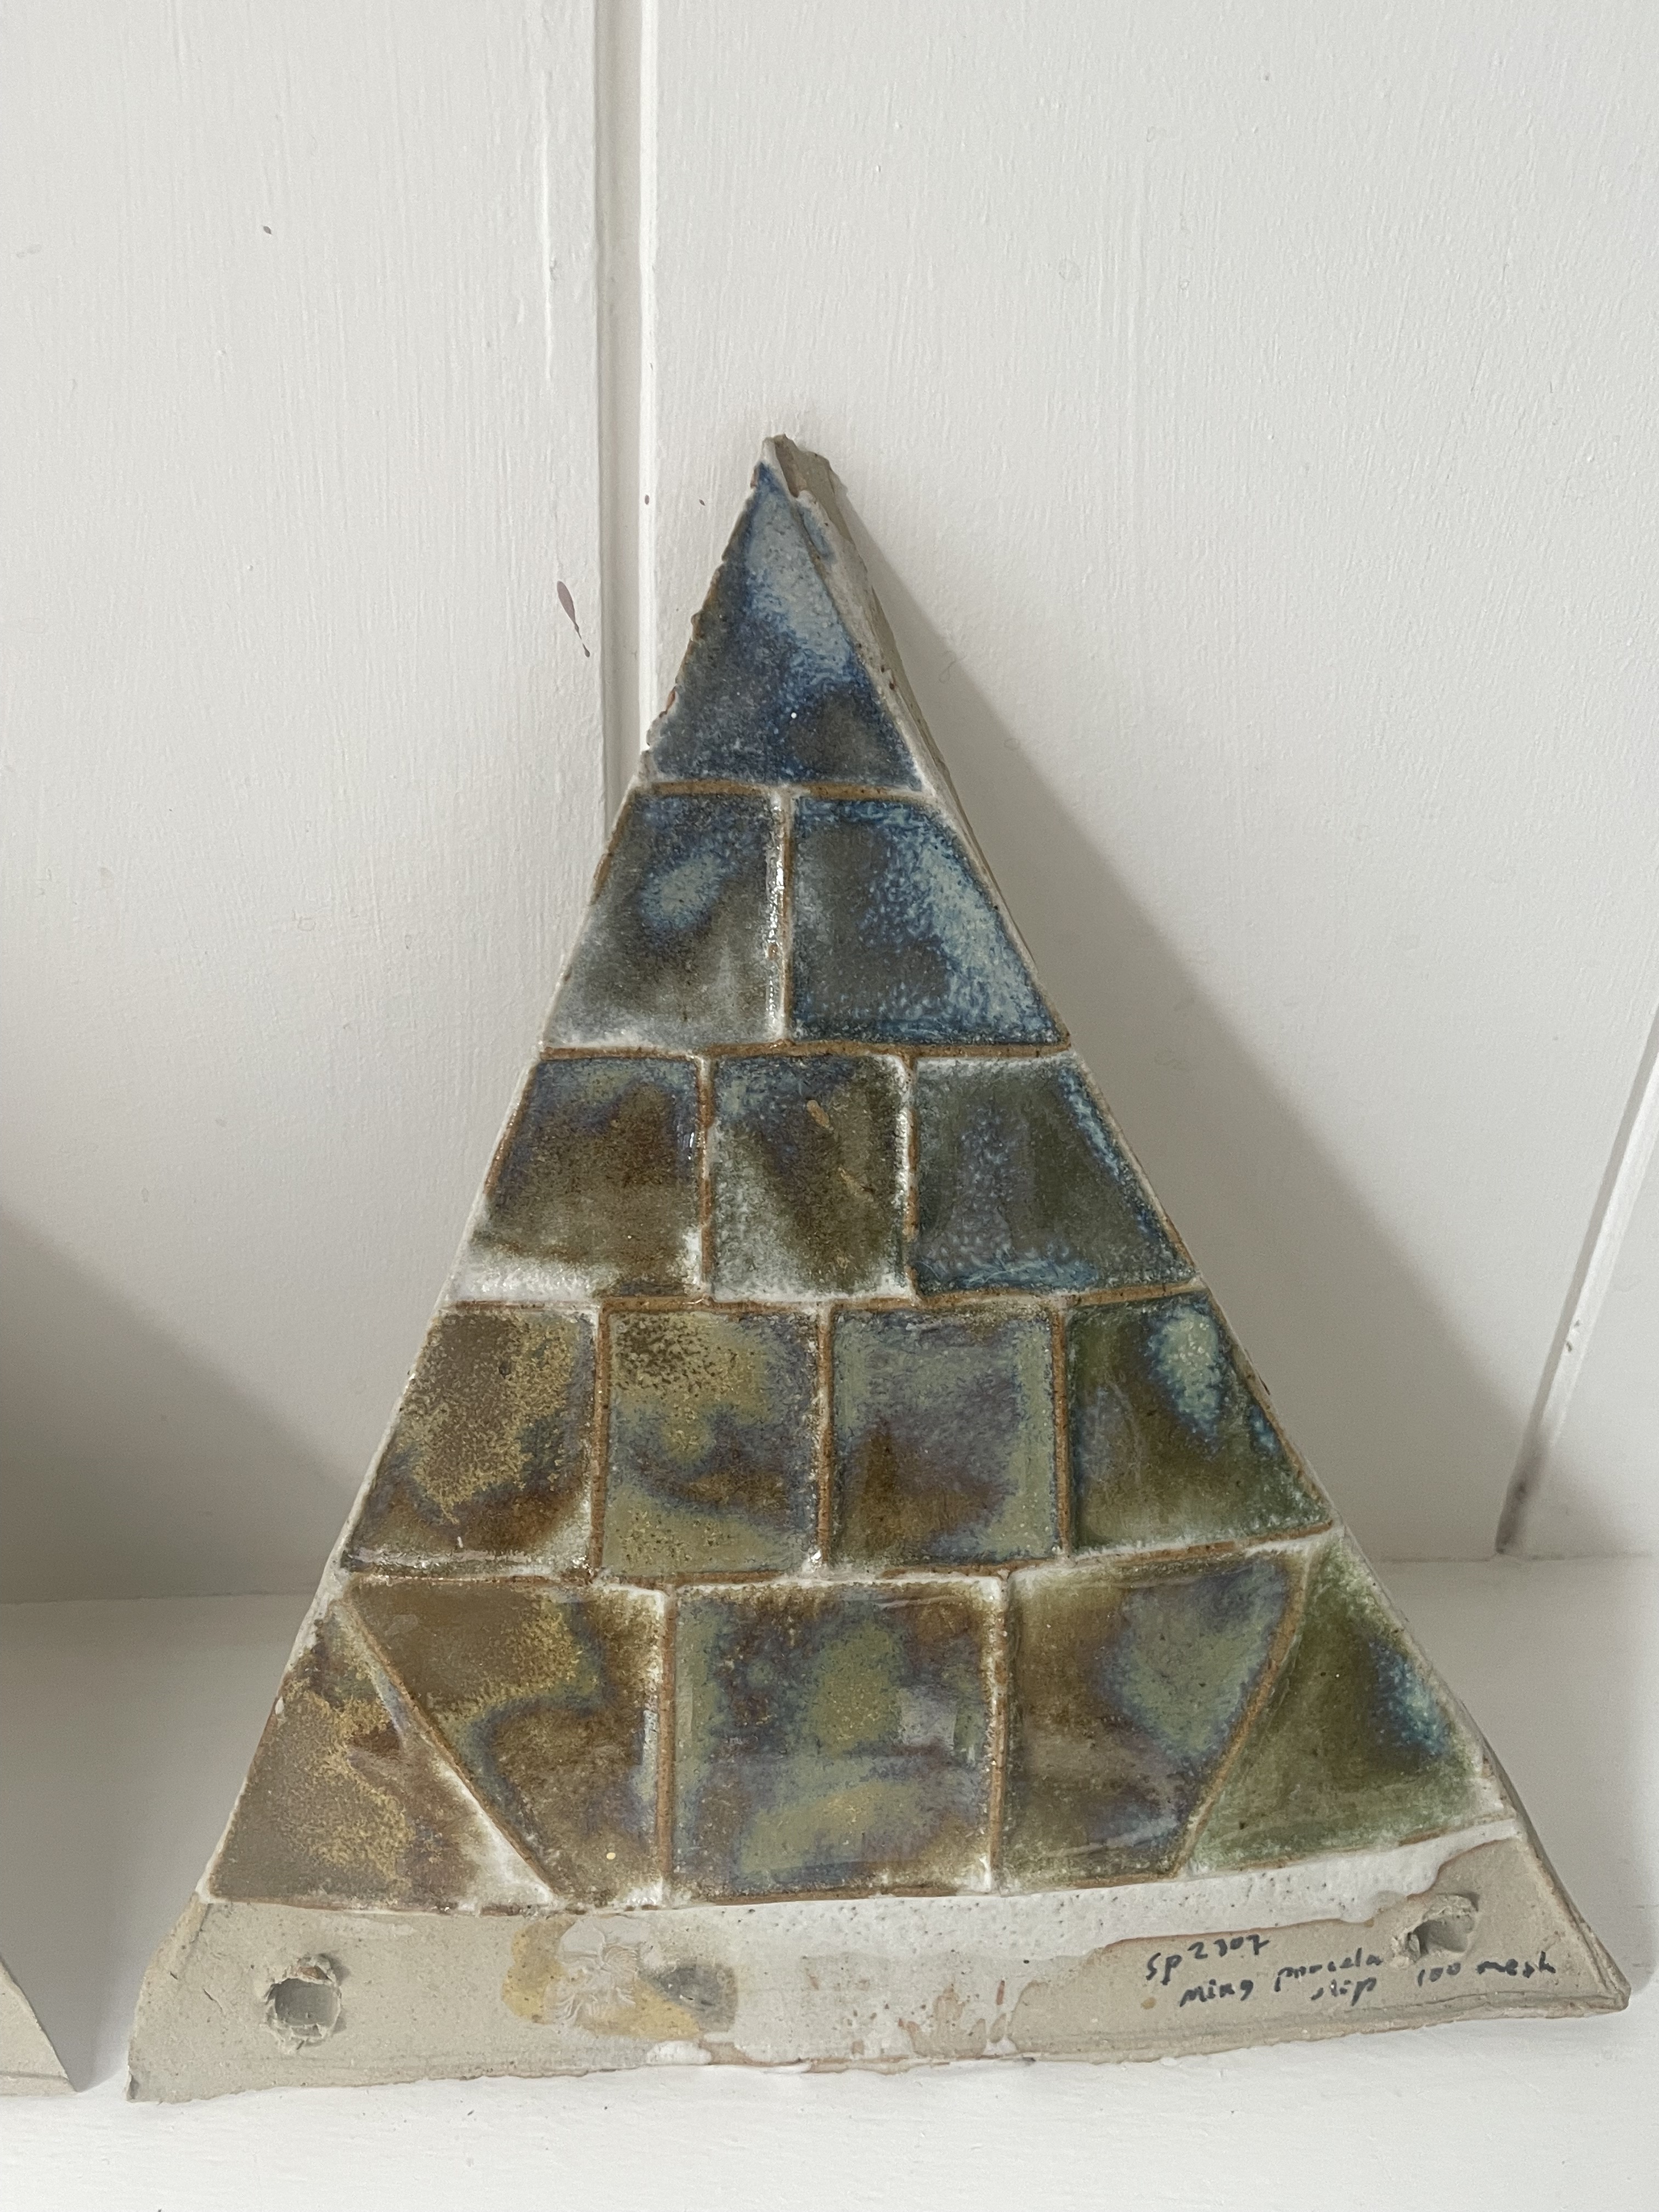
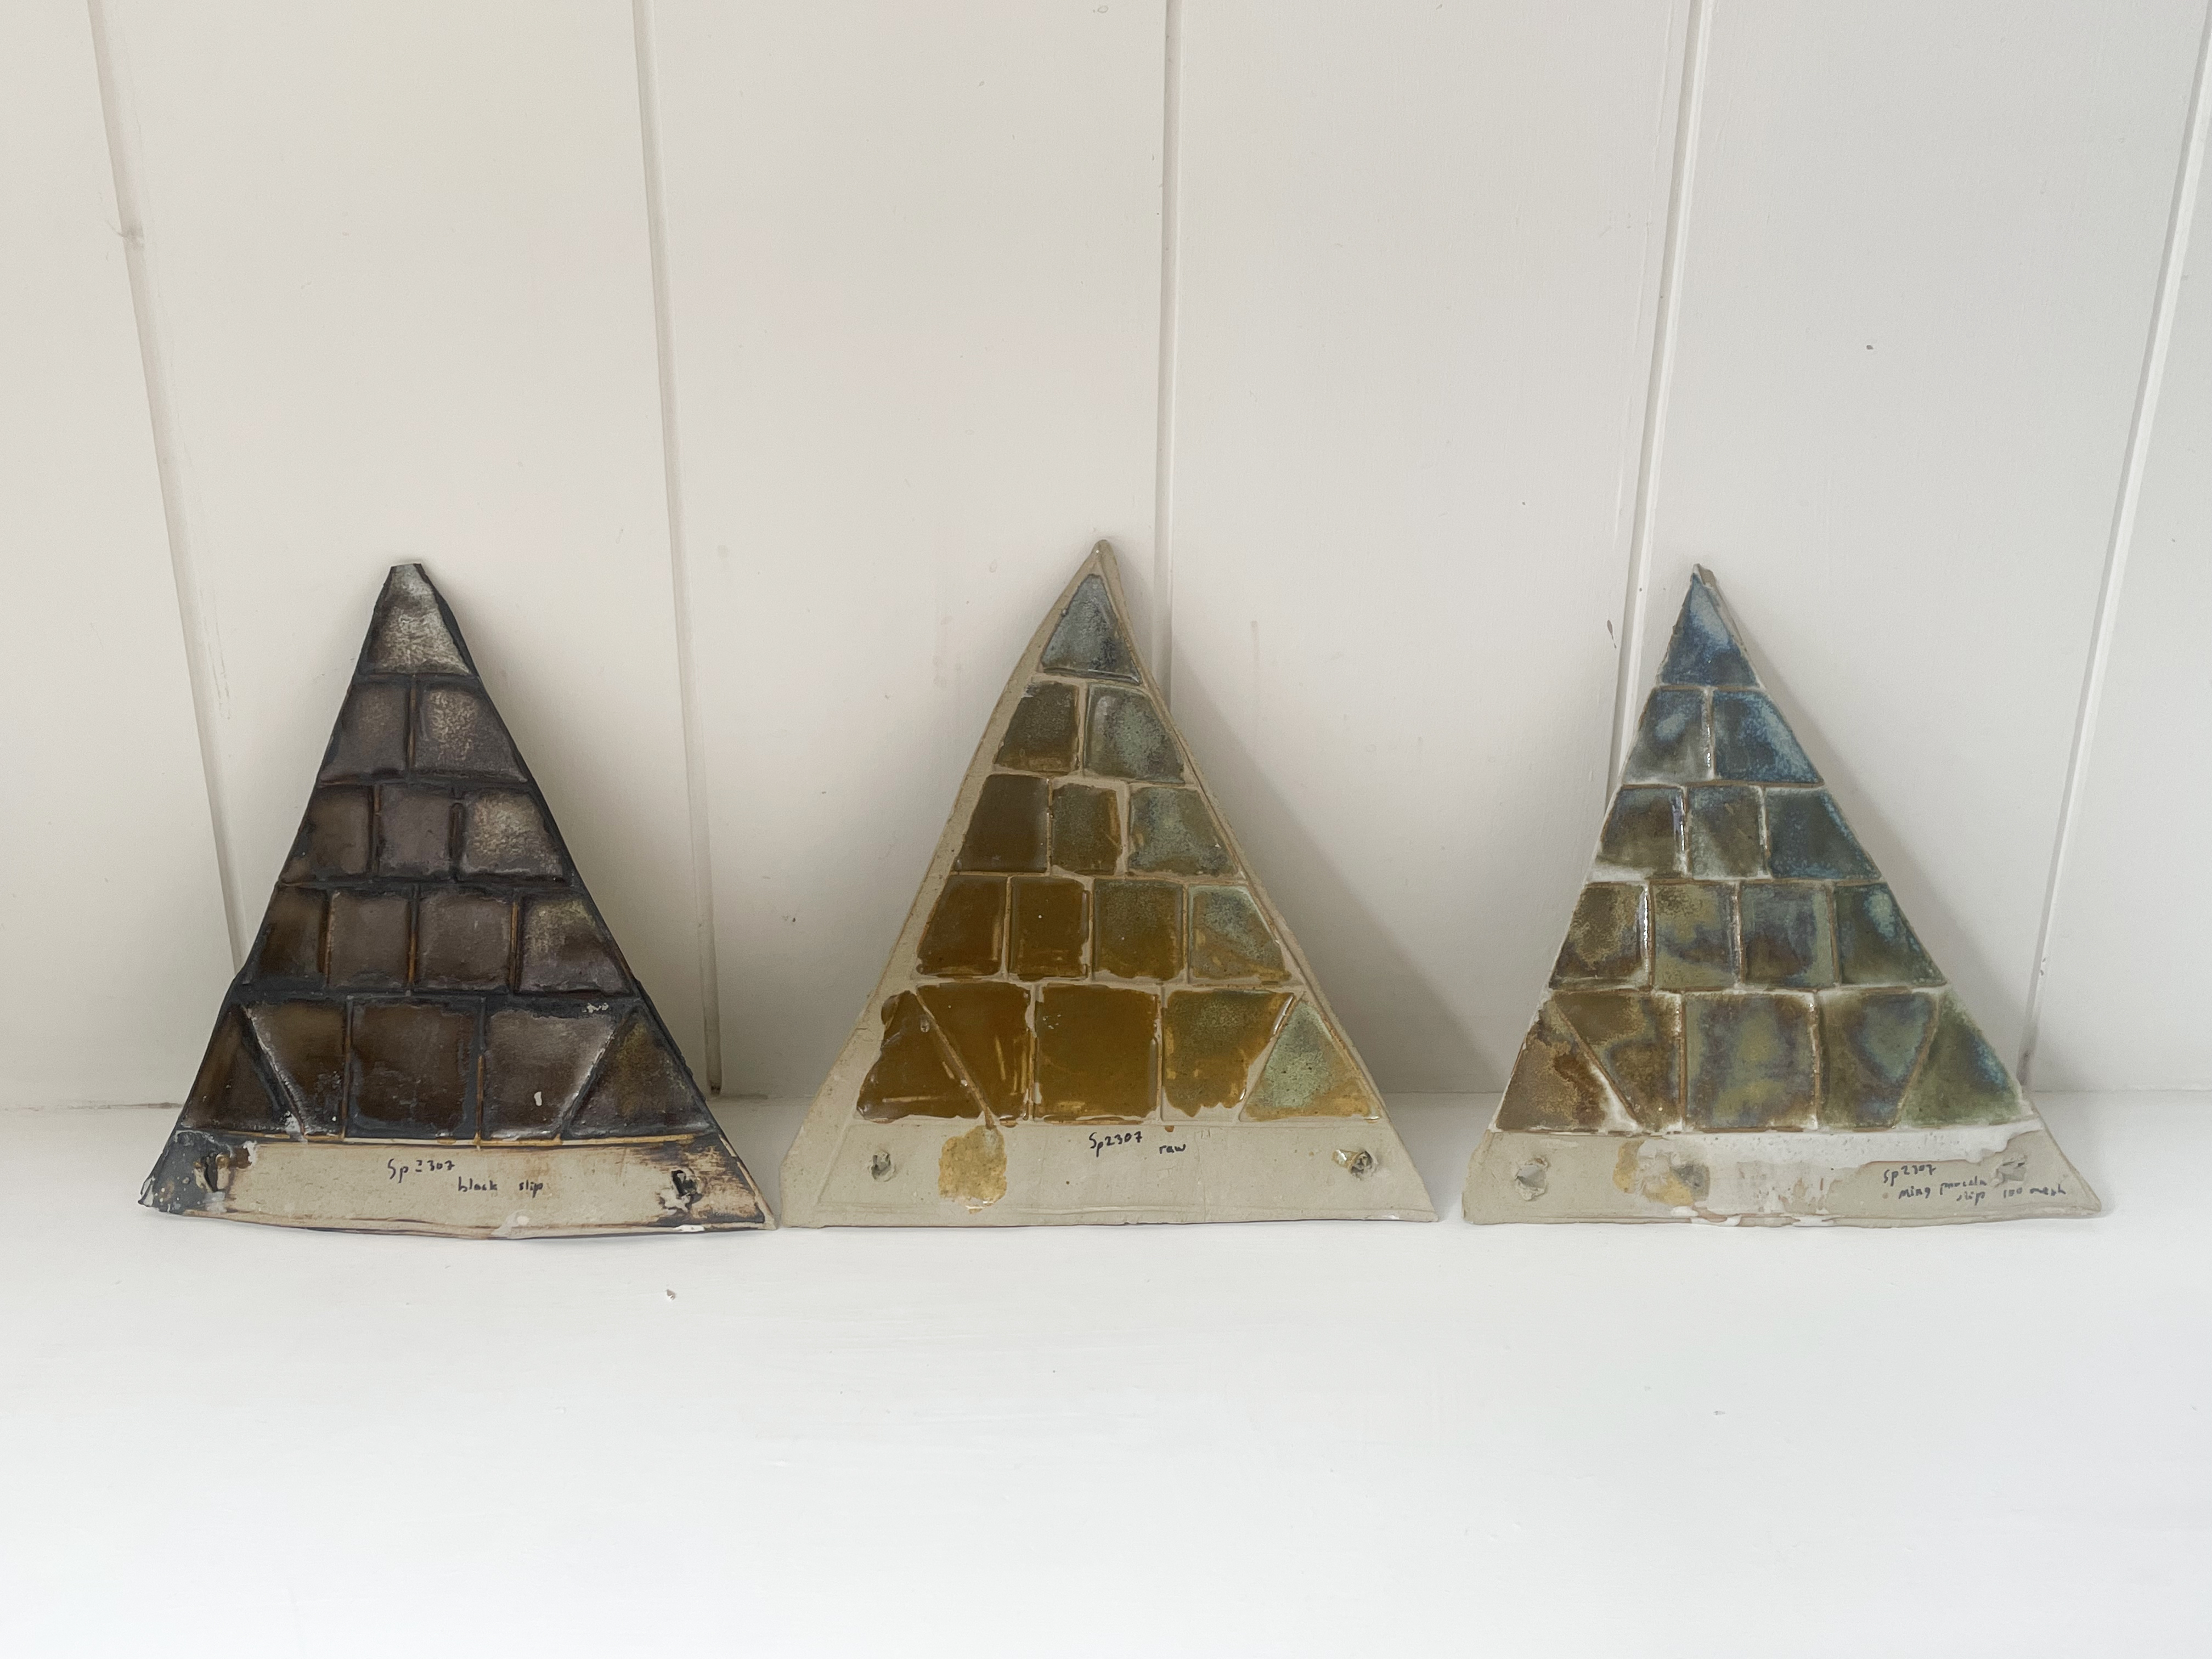
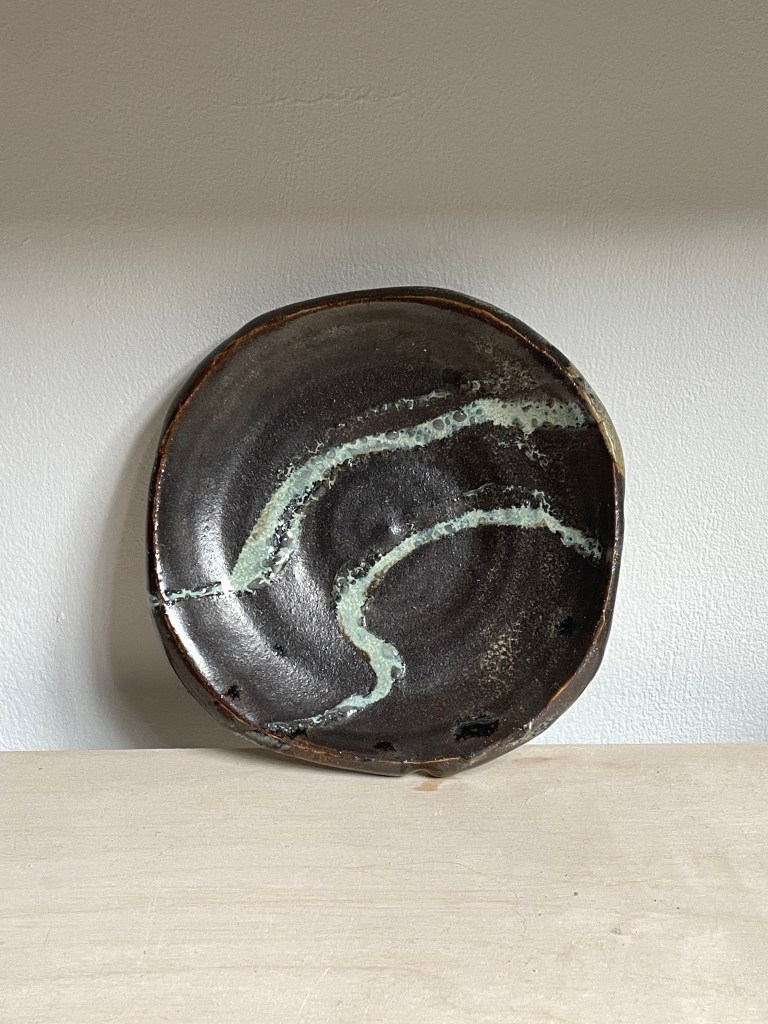
Already from that one test you have a pallet of colours and surfaces you could build a career off – and all from one triaxial! Wowwww! What’s interesting is that if you had only done this triaxial on the clay body, getting all of those murky awful browns, you might have never used the glaze again. But on the porcelain slip and black slip the same glazes look very lively. Here is a little plate I made using a glaze from this triaxial, layering the two slips.
Alternatively, why not dip multiple sets of the same tiles and try them with different firing cycles? Iron and titanium both behave in interesting ways when control cooled in certain glaze makeups – fertile ground for experimentation.
It may sound complicated at first, but once you have done a couple of these you will very quickly get to grips with them and you can then use them for all manor of experimentation. What’s more, if you have an existing bucket of a base glaze that you like, I’ll now introduce how you can use the mixed glaze to do triaxial testing, which is a very quick way of developing lots of different colours from the same base. This one is slightly more complicated, but don’t be intimidated! It is a simple process to learn and will save you a lot of time in the long run. I would recommend that if you are new to triaxials you do not immediately read this section, but get comfortable with mixing up from powder first before carrying on – I am sure heads must be spinning as it is!
Triaxial testing from a ready-mixed glaze
If the glaze is already mixed, you might be wondering how we can know how much dry powder is the in the bucket ? Well, to calculate this we are going to make use of something called Brongniart’s formula. Fortunately for us we can use the internet to help us here:
https://pietermostert.github.io/SG_calc/html/brongniart.html
We need to enter the weight of the glaze in the bucket, the weight of a syringe full of glaze, and the weight of syringe full of water. To weigh the glaze in the bucket place an empty bucket on your scales, tare, and pour the contents in and record the measurement. Lets say it weight 3750g. Next, if we are using our trusty 60ml syringe then we already know the syringe full of water weighs 60g. So, place your syringe on your scales and hit tare. Now, draw up 60ml of glaze and return the syringe to the scales. Let’s say it weighs 90g. Now, 90g divided by 60g would give you the specific gravity of the glaze, which is 1.5 in this case. We don’t need to know that for this particular test but it is good to get in the habit of recording specific gravity so you can get more consistent glaze results between batches and adjust as necessary.
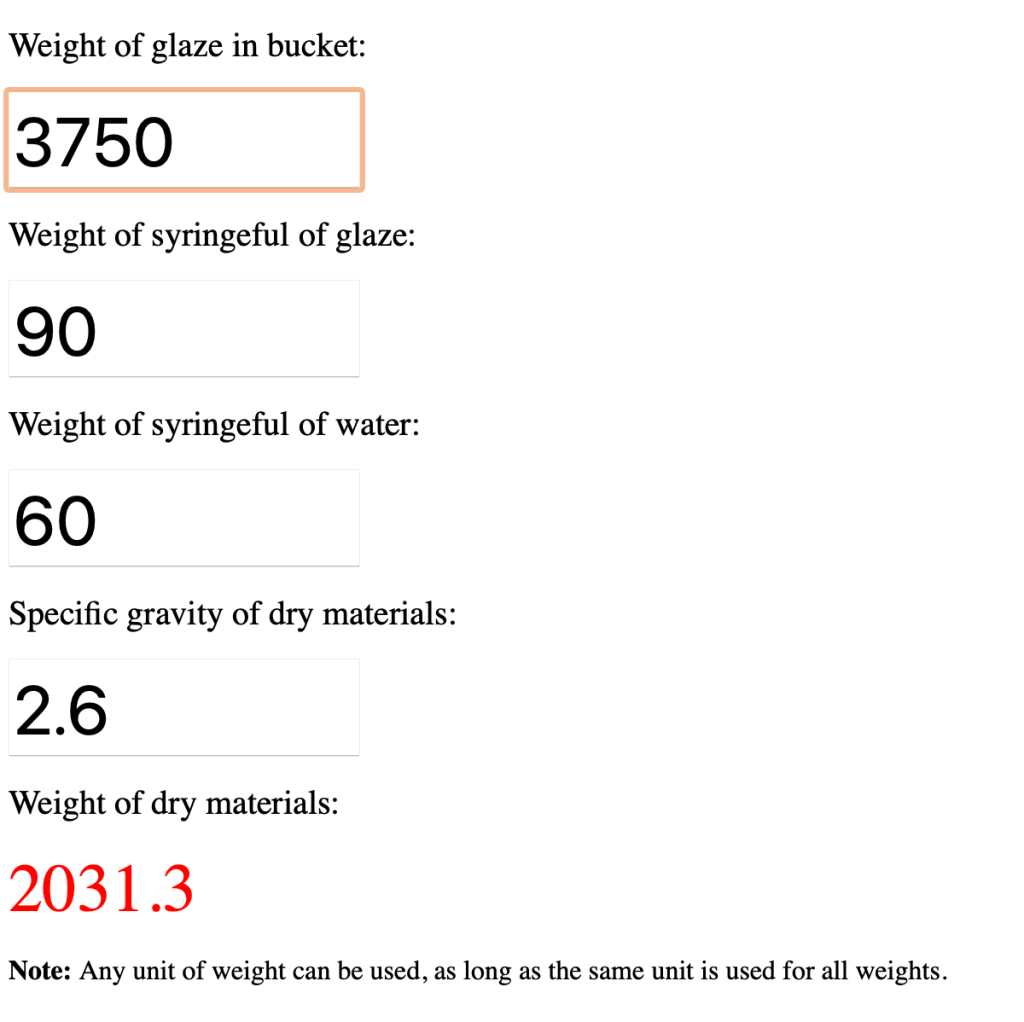
The software now tells us how much dry material is in our glaze bucket, which in this example is 2031.3 (It should be noted that the SG of the dry materials is assumed as 2.6, which is true for many, but not all, ceramic materials and so there is a slight degree of inaccuracy in this method but it should not impact testing in this way).
If the dry weight is 2031.3g, then the water weighs the rest, so in this example there is 1718.7g of water in the bucket. What we need to know is how many grams of glaze do we need to put in to each of our three corners so that we have 200g of dry material in each. To work this out, divide the dry weight by the water content (2031.3 / 1718.7) to get 1.1817, and then divide 200 by this result to get 169.24. We now know that approx 200g of powder will also have 169g of water, so we deposit 369 g of glaze from our bucket in to our three corner cups. Our corners now have 200g of powder already suspended in water, so if we are adding, say 5% zinc, we add 10g of zinc to that corner glaze. We can do this for any of our colouring oxides, variegators, opacifiers or whatever we are testing in the corners. Sieve, and then blend as normal.
Testing in this way from an existing bucket, several triaxials can be set up in very quick succession, and so our rate of return on testing is much higher and our effort and time is saved. It is another great argument for testing with known and trusted and successful base recipes to get what you want rather than referring to glaze books or the internet which contain a diabolical array of terrible recipes !
It is not so straightforward to try to explain things like this in a succinct and accessible way, whilst still being thorough, so please do leave any questions (or corrections!) in the comments below. I know this procedure has been explained many times before in different publications and by different potters but I am hoping that my attempt to explain the procedure is helpful. I really love doing triaxials and many of my best glazes have come out of them – not least the base glaze given in this article which I have refined through numerous triaxials to get it to what it is.
Two great sources of reading on the topic are Mathew Blakely’s Rock Glazes Unearthed and Brian Sutherland’s Glazes from Natural Sources.
